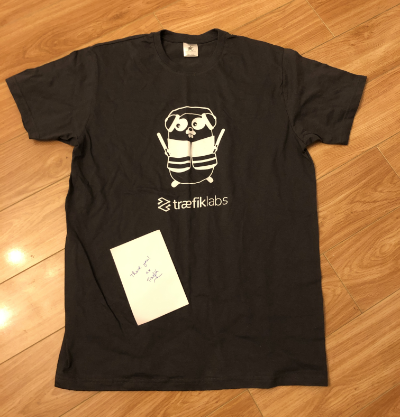
Update: Traefik reached out and sent me this awesome goodie bag for this article!
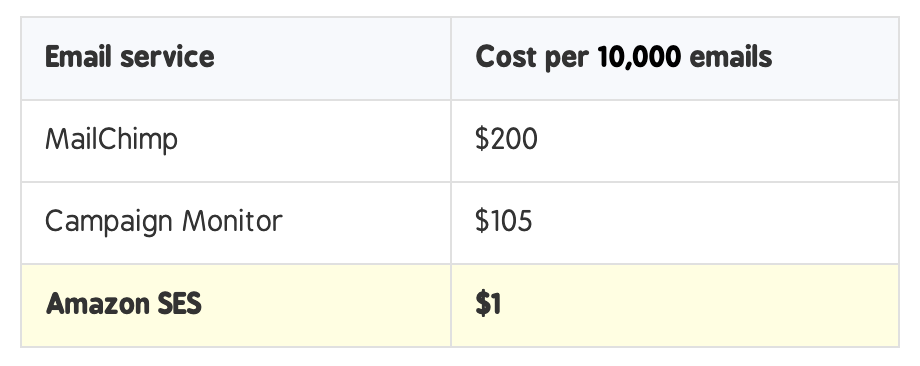
Sendy is an amazing application. It's basically software that gives you the ability to utilize Amazon SES to send newsletters to your members. It is also much, much cheaper than the alternatives. Sendy just costs $69 once off (at the time of writing) and it should save you the cost multiple times over, assuming you have some subscribers to send newsletters to!
Why Sendy
Here are the cost benefits over alternatives like Campaign Monitor and MailChimp:
I was originally using Mailchimp for my old Wordpress blog. I knew that when I hit 2,000 subscribers I would enter the next pricing tier which didn't make financial sense yet. So, when I migrated my blog to ghost, I switched to SendGrid which I used for transactional emails. I also needed the ability to migrate/delete members that had signed up to my Ghost blog, into my SendGrid email list instead.
So after some research I found a Zapier integration that would connect my Ghost blog to SendGrid and add/update/delete members as required. The only issue is that this was for version 2 (which is now deprecated) and the version 3 of the integration only had some basic api functions (bummer).
So I contacted the SendGrid support team to inquire if it was possible to get the integration between Ghost and SendGrid updated. They said they would add it to their list, which means it will happen at some unspecified day in the future. This left me with two choices: either keep manually exporting my contact list from Ghost and adding it to my Newsletter email list, or figure out some other solution. So that is how I stumbled onto Sendy, because after scanning the Zapier integration list I saw that, yes, Sendy was listed!
Getting Started
The normal way to install Sendy is to spin up a VPS (I recommend DigitalOcean) and follow the installation instructions provided on the Sendy website. This works great, but I like using Kubernetes so I wanted to figure out a way to get it working on my clusters. Luckily, DigitalOcean also lets you build Kubernetes Clusters!

To start, get a domain (one where you could perhaps use newsletters for a lot of your different projects). For example, something like projects.com could be cool because you could have 'newsletters.projects.com'. You can even charge other users to send newsletters if you want to build a newsletter provider service.
You can now purchase your Sendy license, or upgrade from a stable release version.
In your Sendy dashboard, set your domain as the licensed one. If you want to use staging and production clusters it will also let you deploy on sub-domains for your licensed domain.
If you need to change the domain for your license code later you can do so at Change Licensed Domain and insert your license key:

Now let's set up your database. I decided to use a helm chart of MariaDB. You can also use a managed database from DigitalOcean or another provider. If you have installed the self managed version of MariaDB (This link is the replicated version - Galera) on your cluster you can also install a visual interface tool such as PhpMyAdmin.
Once installed, you can either open it up to the outside using a NodePort configuration or via a LoadBalancer (ensure you enabled HTTPS on your database), or you can port forward the database on localhost and connect using your browser. To port forward you can do:
kubectl port-forward --namespace databases svc/phpmyadmin 8888:80This should result in something like:
Forwarding from 127.0.0.1:8888 -> 8080
Forwarding from [::1]:8888 -> 8080Now you can go to your browser and and in a new tab type the following in the address bar:
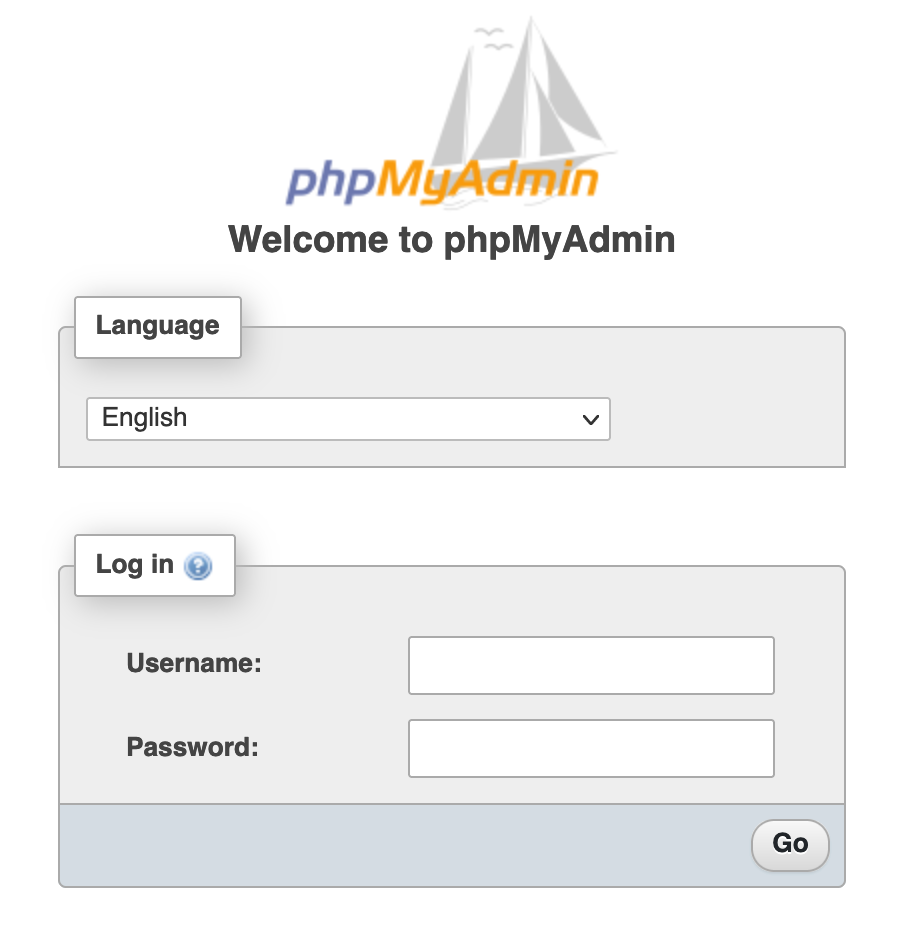
http://localhost:8888/You should now see the login page:
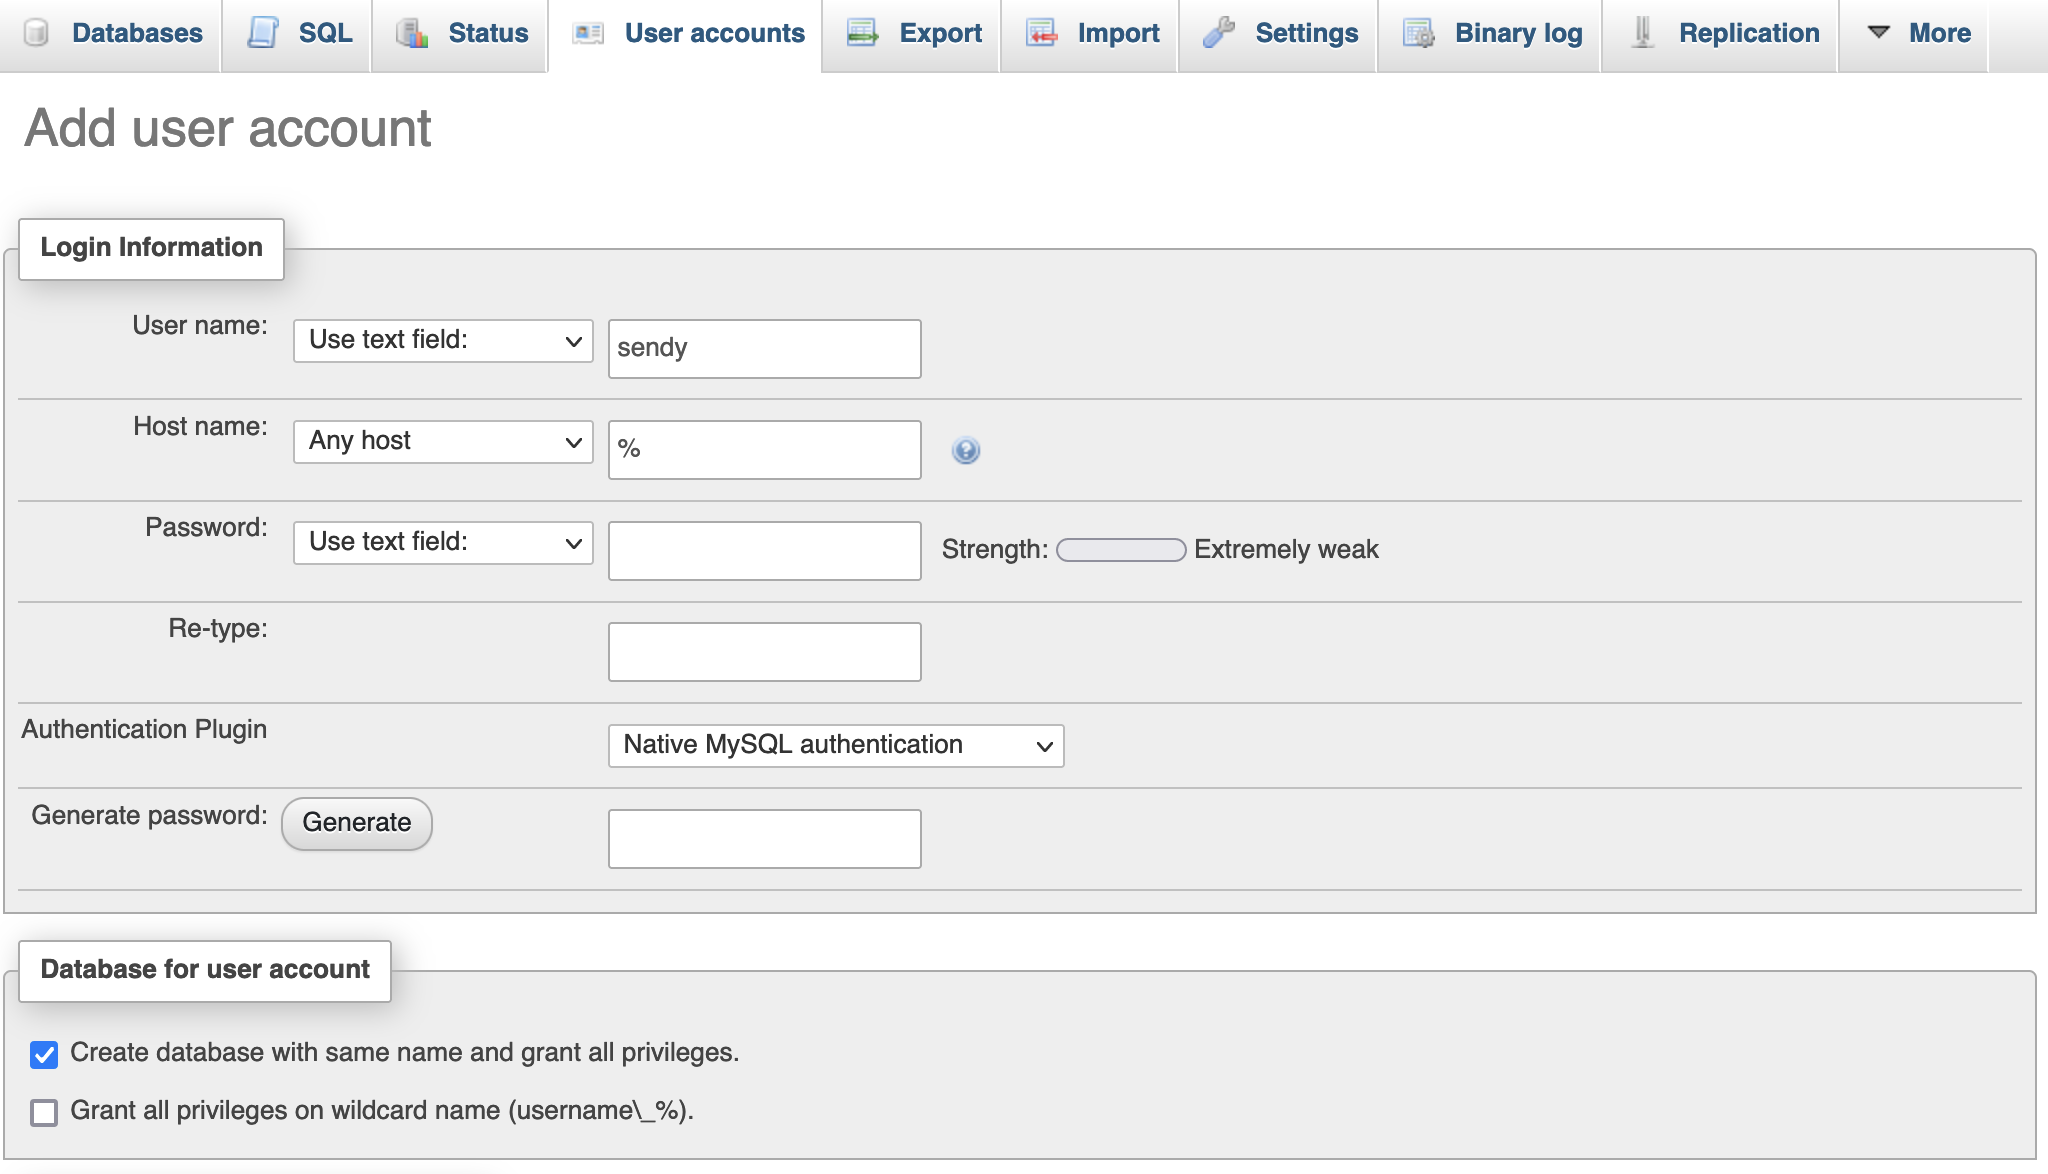
When you are logged in successfully you should see a section that lets you create a new user. Create a user with the name "sendy" and a secure password of your choosing. You will also see a checkbox to create a database table for this user. Enable this as the following image showcases:
You should store these details in a secure location as we will be using them soon.
The Newsletter
Sign up to get a monthly email about my coding journey and receive exclusive access to unpublished material and resources.
After some research I found that a developer called bubbajames had created a docker file so that you could deploy Sendy using the docker platform. This was great for people that used docker on their VPS, but I wanted to go one step further. Having that docker file was immensely useful for my plan. You will see why shortly.
You can download the entire project folder from my repo. Inside you will see the docker folder. Open this in your editor and navigate to the /includes folder. Inside you should see the config.php file. In here edit the following and insert the database, user and domain details that you created for Sendy. You can enter HTTPS instead of HTTP for the domain section.
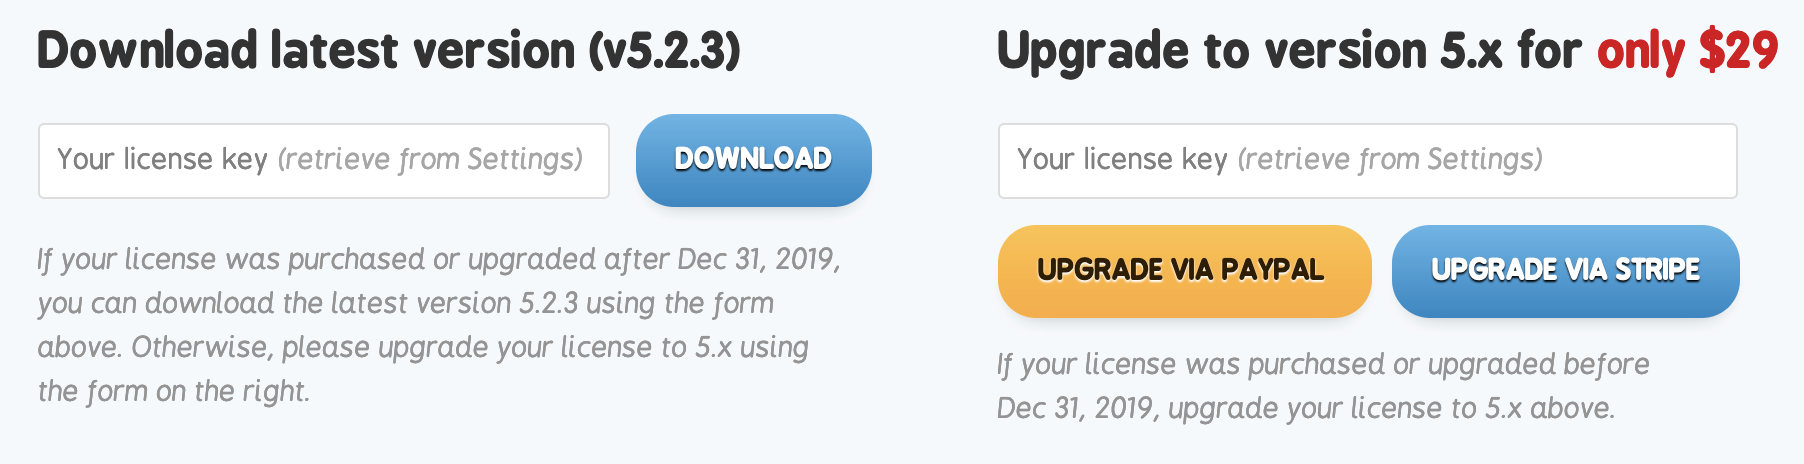
The issue with the guys docker image is that it was created using the version 5.2 of Sendy (He now updated it to 5.2.3), and hasn't been updated yet (at the time of writing). I like to keep my software updated to avail of the all fancy features. It's free for the incremental updates until the next major version, so head on over to Sendy and download the latest zip file if you haven't already (You will need to enter your license code).
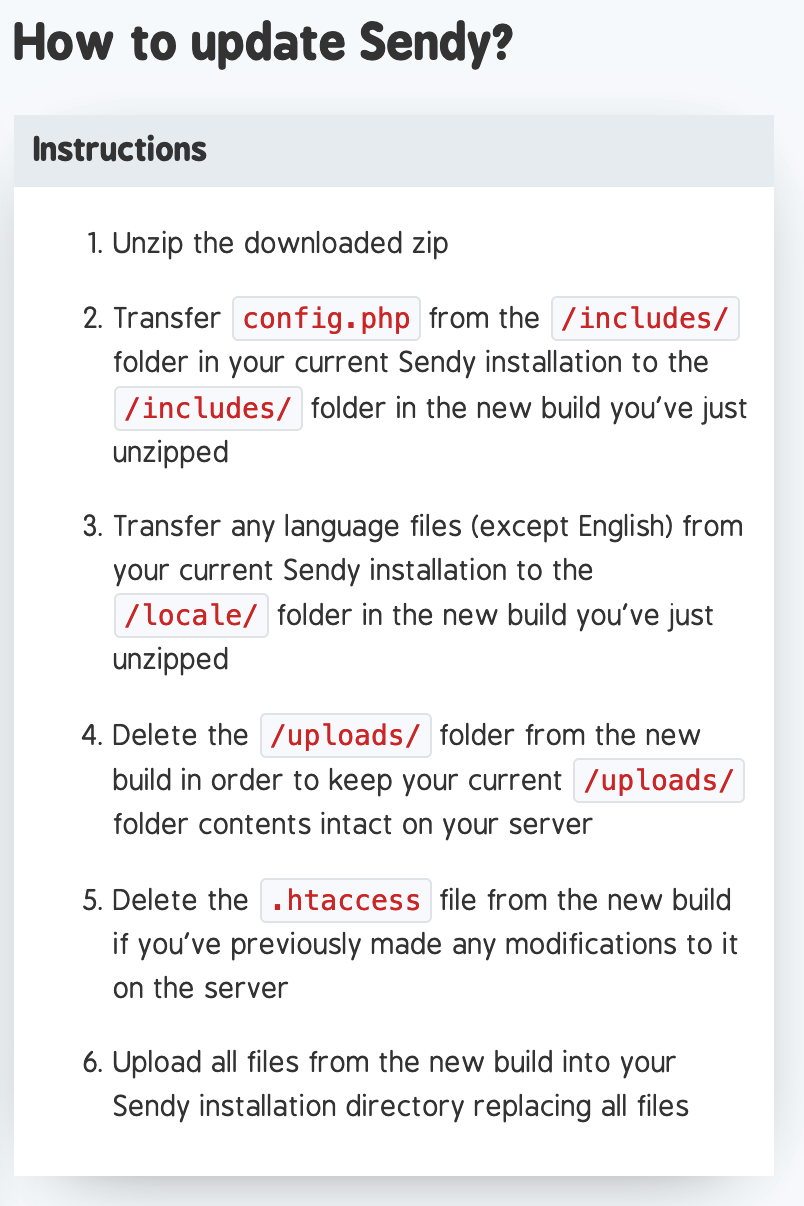
Once you have the latest zip you can go ahead and change the following files in your docker folder (That you downloaded from my repo, or Sendy).
So in the artifacts folder change the file name from 5.2 to 5.2.3
You can replace the old sendy-5.2.zip file with the one you downloaded called sendy-5.2.3.zip
In the root of the docker folder is a version file, inside change the value from 5.2 to 5.2.3
Inside the Dockerfile you can change:
ARG SENDY_VER=5.2
ARG ARTIFACT_DIR=5.2To
ARG SENDY_VER=5.2.3
ARG ARTIFACT_DIR=5.2.3Sendy Replication On Kubernetes
I am not replicating Sendy on my staging and production cluster. Sendy uses cron jobs so I would need to remove the cron job file, create a Kubernetes CronJob that would run and send commands to my Sendy pods. All of this is done so as to avoid having multiple pods duplicating actions because of the individual cron jobs running inside them. I opted for just having one instance running to avoid this. In the future I might spend some time to build a more elegant solution, or if this is something that interests you, please open a pull request at SendyKube.
Project Structure
Everything from this point on you should do for both the staging and for the production environments separately.
Ensure you have a SQL database ready that works with Sendy, MariaDB is a good one. Ensure you create the credentials that are needed. Alternatively you can use a managed database with DigitalOcean.
Our project folder structure will look like the following:
sendy
  /production <- see repo for full files
  /staging <- see repo for full files
  /docker
    cron
    Dockerfile
    version
    /artifacts
      docker-entrypoint.sh
      /5.2.3
        sendy-5.2.3.zip
        /includes
          config.php
          update.php
You can see the entire file list in the repository
For the secrets files we should encrypt the details. This lets us deploy the files to our repository, to have one source of truth. So for this you should install and configure sealed secrets for both your staging and production clusters. You could also ignore this step if you wanted to just deploy normal secrets (which are encoded in base64, not encrypted). If you decide to use encryption, you should install sealed secrets using the helm chart here: SealedSecrets
Once installed, be sure to check the the correct resources are running by using the following command:
kubectl get all -n kube-systemThis should show you resources in the kube-system namespace where you installed the SealedSecrets helm chart (assuming you kept the default settings):
pod/sealed-secrets-5c88886466-4rnng    1/1     Running   0          26d
service/sealed-secrets   ClusterIP   10.245.241.51   <none>        8080/TCP                 28d
deployment.apps/sealed-secrets    1/1     1            1           28d
replicaset.apps/sealed-secrets-5c88886466 1 1 1 28dNow that we have confirmed that sealed secrets is installed, you need to download the cert.pem file for both your production and staging clusters. To get the public encryption key from a cluster you can:
First expose the kubeseal service to localhost:
kubectl port-forward service/sealed-secrets -n kube-system 8081:8080Then you can call the endpoint to get the file:
curl localhost:8081/v1/cert.pemIn some commands below, I will be using these cert.pem files to encrypt some secret files. So it will look for them in a certain location. You can also just change the command to suit your own cert.pem file locations. The folder structure where I store my .pem files is :
./secrets/sealed-secrets/secrets/staging/cert.pem
./secrets/sealed-secrets/secrets/production/cert.pem
./newsletters/sendyNow we need to set some key/value pairs. These values will be used inside the cluster to be able to access a Sendy Docker file that we will be creating. It will be stored in our GitLab image repository.
For the variables, you first need to encode them in base64 format. This a standardized encoding that Kubernetes uses. You can encode each password or value using the following command:
echo -n 'superpower' | base64Which would result in:
c3VwZXJwb3dlcg==If you need to decode to remember what they are, you can run:
echo 'c3VwZXJwb3dlcg==' | base64 -DNow you need to set up the permissions for your docker registry in Gitlab. This will let us store the newly created Dockerfile there during the deployment stage.
For this we need to navigate to the following section within your repo:
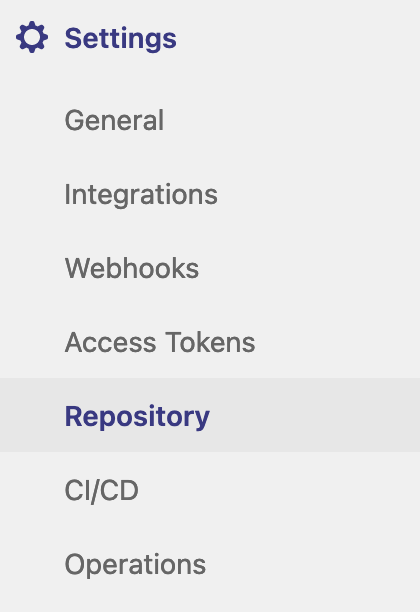
Once here you should be able to create a deploy token with the following details:
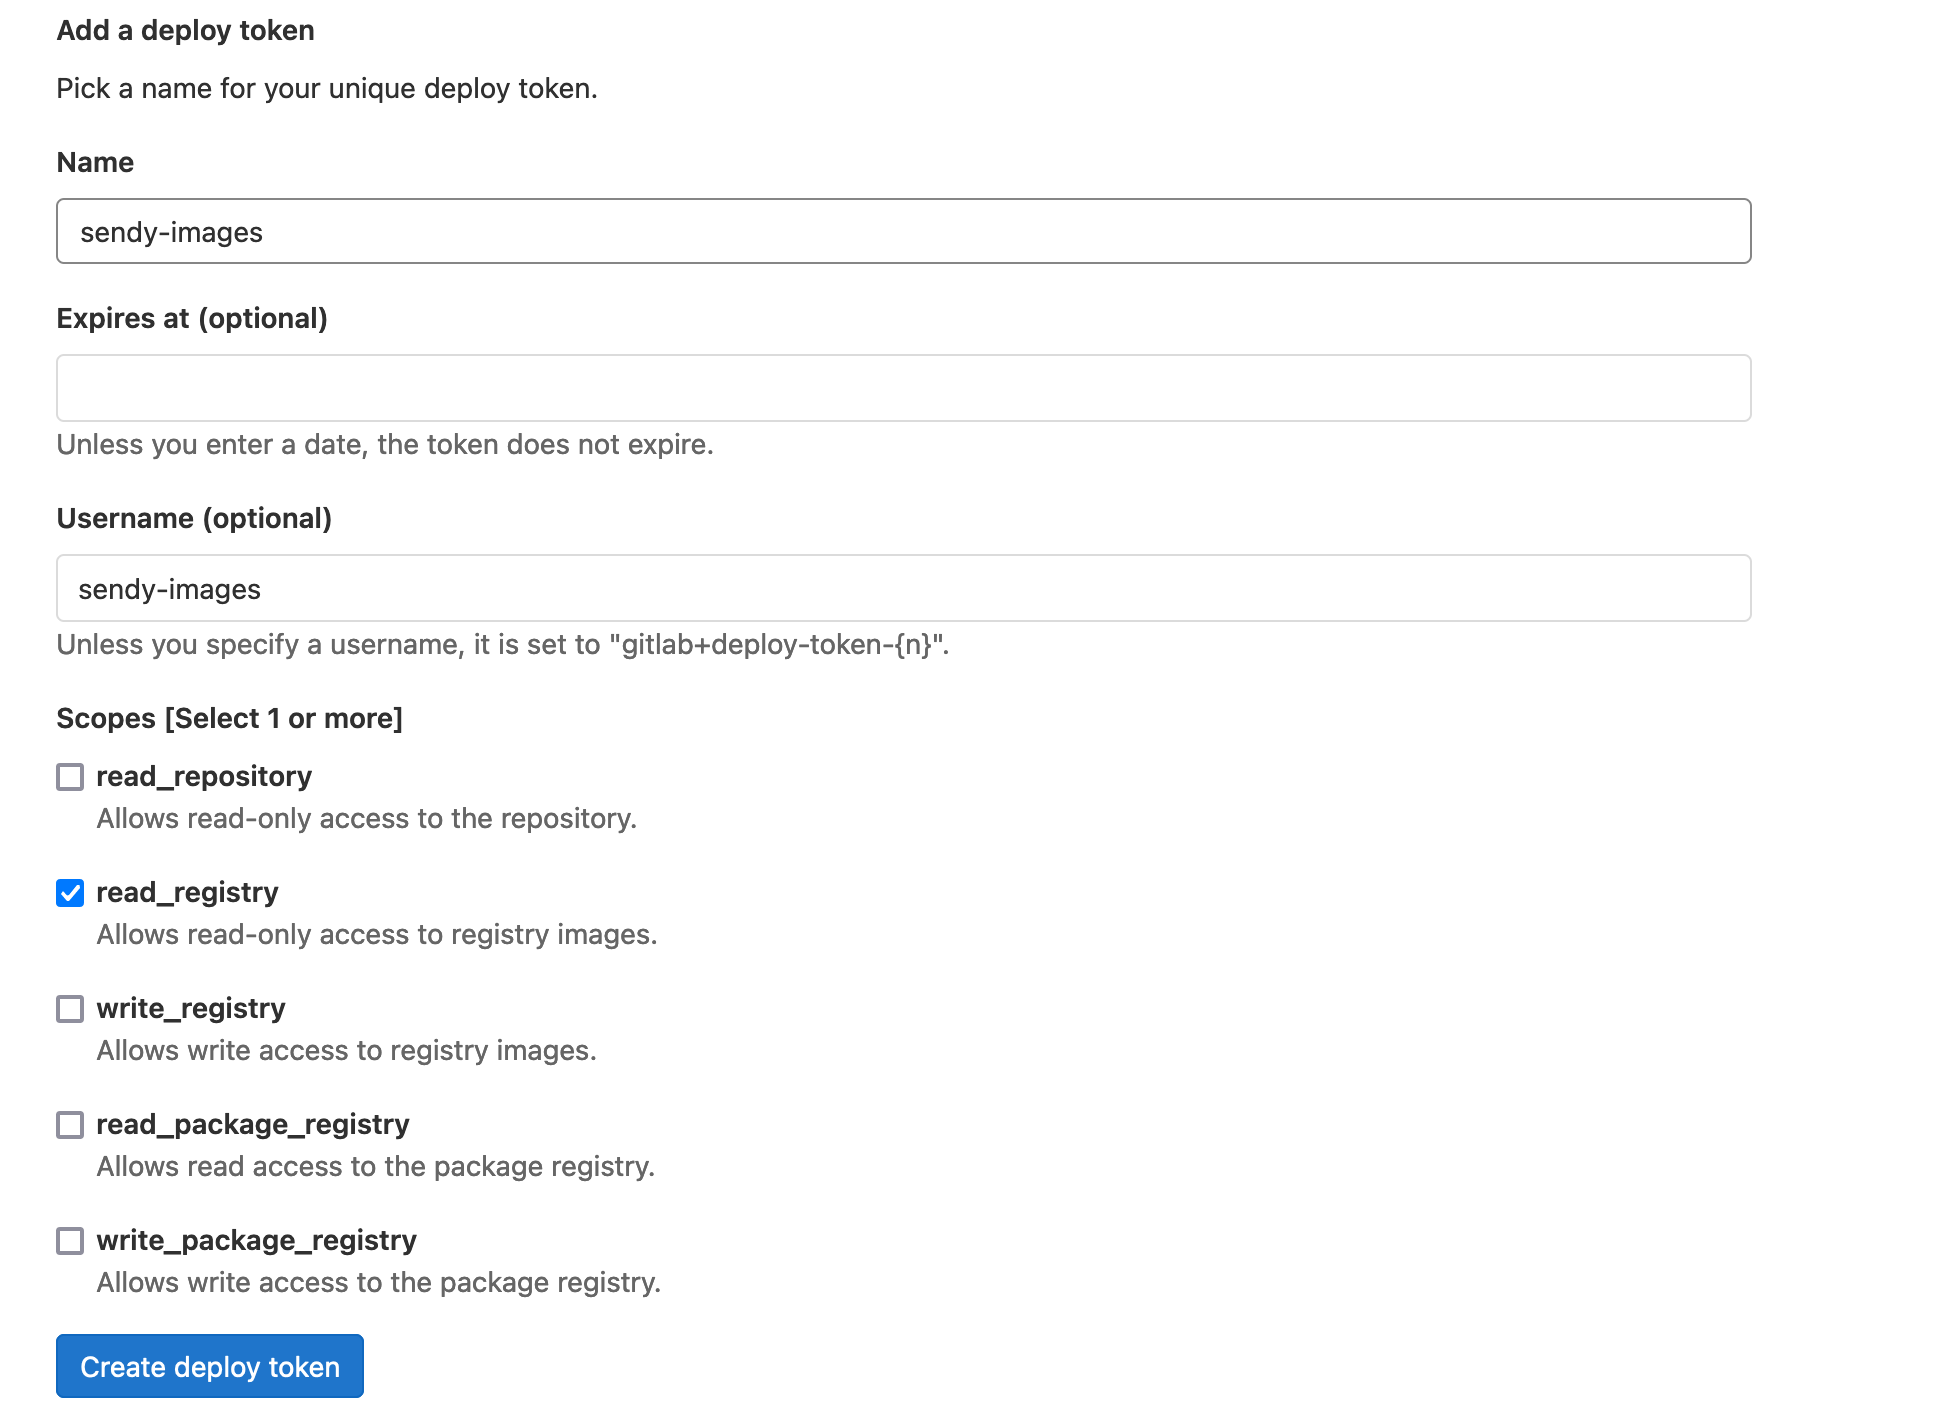
Now you need to gather all the base64 values for your user within Gitlab, it is good practise to create a new user if you are using the Administrator account (ensure the new user has been added with the relevant permissions to the Sendy repo - ensure you have also created a repo called 'sendy').
When you have collected all the base64 values you can now add them to your docker-config.yml file for staging and production (should be unique per different cluster). Ensure the url path matches the url of your sendy repo in GitLab.
{
    "auths": {
        "https://gitlab.domain.com:5050/path/to/sendy-repo":{
            "username":"eXV5YXhhTk1ibVRGQ2oK",
            "password":"RUVHdGFCRkpQSDh6ZW4K",
            "email":"bVBoelJIeWJEcnZHYXQK=",
            "auth":"NDQ0NTQ1NDU0NTRzZGZkZHJ2R2F0Cg=="
        }
    }
}
We will now encode this docker configuration file and add it to a secrets file so that our cluster can use it. You can do this by using the following command from the root of your project folder:
cat ./production/.production-docker-config.json | base64Which results in something like this:
ewogICAgYXV0aHM6IHsKICAgICAgICPodHRwczovL2dpdGxhYi5kb21haW4uY29tOjUwNTAvcHJvamVjdHMvbmV3c2xldHRlcnMvc2VuZHk6ewogICAgICAgICAgICB1c2VybmFtZTplWFY1WVhoaFRrMWliVlJHUTJvSywKICAgICAgICAgICAgcGFzc3dvcmQ6UlVWSGRHRkNSa3BRU0RoNlpXNEssCiAgICAgICAgICAgIGVtYWlsOmJWQm9lbEpJZVdKRWNuWkhZWFFLPSwKICAgICAgICAgICAgYXV0aDpORFEwTlRRMU5EVTBOVFJ6Wkdaa1pISjJSMkYwQ2c9PQogICAgICAgIH0KICAgIH0KfQo=Now we can add it to our secrets file (production-registry-credentials.yml):
apiVersion: v1
kind: Secret
metadata:
  name: registry-credentials
  namespace: newsletters
type: kubernetes.io/dockerconfigjson
data:
  .dockerconfigjson: ewogICAgYXV0aHM6IHsKICAgICAgICPodHRwczovL2dpdGxhYi5kb21haW4uY29tOjUwNTAvcHJvamVjdHMvbmV3c2xldHRlcnMvc2VuZHk6ewogICAgICAgICAgICB1c2VybmFtZTplWFY1WVhoaFRrMWliVlJHUTJvSywKICAgICAgICAgICAgcGFzc3dvcmQ6UlVWSGRHRkNSa3BRU0RoNlpXNEssCiAgICAgICAgICAgIGVtYWlsOmJWQm9lbEpJZVdKRWNuWkhZWFFLPSwKICAgICAgICAgICAgYXV0aDpORFEwTlRRMU5EVTBOVFJ6Wkdaa1pISjJSMkYwQ2c9PQogICAgICAgIH0KICAgIH0KfQo=
This file is also added to the .gitignore so that it will not be committed online.
We will now turn this secret (which just has the private details encoded) into a SealedSecret, where it becomes encrypted.
So we run this command from the root of the project folder. Be sure to specify where your cert.pem file is located (ensure it is the correct one for either the staging or the production cluster)
kubeseal < ./production/production-registry-credentials.yml --cert ../../secrets/sealed-secrets/secrets/production/cert.pem -o yaml > ./production/production-registry-credentials-encrypted.ymlThe result should look something like:
apiVersion: bitnami.com/v1alpha1
kind: SealedSecret
metadata:
  creationTimestamp: null
  name: registry-credentials
  namespace: newsletters
spec:
  encryptedData:
    .dockerconfigjson: <large-encrypted-string-here>
  template:
    metadata:
      creationTimestamp: null
      name: registry-credentials
      namespace: newsletters
    type: kubernetes.io/dockerconfigjson
Now that file is ready to be used in the deployment. Next we move onto some of the other files. Be sure to replace "domain" with whatever your project name is (without the extension i.e .com, .net etc). You will also replace it in the file names. These are just the production files, you need to do the same for the staging files. You can see them in the repo.
newsletters-domain-ingress-route.yml
This file is used to route traffic that hits our Traefik LoadBalancer to the correct application within our cluster. My cluster is using Traefik for a LoadBalancer but you can also use nginx or others, you just need to replace my Ingress files with yours. In your domain provider ensure to set the LoadBalancers provided IP A records for staging and production (newsletters.staging.domain.com and newsletters.domain.com). You can follow the Traefik instructions here.
apiVersion: traefik.containo.us/v1alpha1
kind: IngressRoute
metadata:
  namespace: newsletters
  name: newsletters-domain-ingress-route
annotations:
  kubernetes.io/ingress.class: "traefik"
  cert-manager.io/issuer: newsletters-domain-issuer
  traefik.ingress.kubernetes.io/router.entrypoints: web
  traefik.frontend.redirect.entryPoint: https
spec:
  entryPoints:
    - web
  routes:
    - match: Host(`newsletters.domain.com`)
      middlewares:
        - name: https-only
      kind: Rule
      services:
        - name: newsletters-production-domain
          namespace: newsletters
port: 80newsletters-domain-secure-ingress-route.yml
Here is the secure version of the ingress file.
apiVersion: traefik.containo.us/v1alpha1
kind: IngressRoute
metadata:
  namespace: newsletters
  name: newsletters-domain-secure-ingress-route
annotations:
  kubernetes.io/ingress.class: "traefik"
  cert-manager.io/issuer: newsletters-domain-issuer
  traefik.ingress.kubernetes.io/router.entrypoints: websecure
  traefik.frontend.redirect.entryPoint: https
spec:
  entryPoints:
    - websecure
  routes:
    - match: Host(`newsletters.domain.com`)
      kind: Rule
      services:
        - name: newsletters-production-domain
          namespace: newsletters
          port: 80
  tls:
    domains:
    - main: newsletters.domain.com
    options:
      namespace: newsletters
secretName: newsletters-domain-com-tlsnewsletters-domain-issuer.yml
This file is used to issue the SSL cert so that we can use HTTPS for our Sendy integration. I used the CertManager helm chart for this, there are other alternatives if you wish to use those (Traefik itself has a built in letsencrypt certificate manager - I just liked the extra control from CertManager). For the email section in the file put in where you would like to get the email notifications from letsencrypt. I have a catch-all set up in my email for my domain so letsencrypt@domain.com will send to my email. You could also create another address for your domains email, basically it's up to you.
apiVersion: cert-manager.io/v1
kind: Issuer
metadata:
  name: newsletters-domain-issuer
  namespace: newsletters
spec:
  acme:
    server: https://acme-v02.api.letsencrypt.org/directory
    email: letsencrypt@domain.com
    privateKeySecretRef:
      name: newsletters-domain-com-tls-letsencrypt
    solvers:
    - http01:
        ingress:
class: traefiknewsletters-domain-solver.yml
This file is the solver for the issuer file.
apiVersion: cert-manager.io/v1
kind: Certificate
metadata:
  name: newsletters-domain-com
  namespace: newsletters
spec:
  secretName: newsletters-domain-com-tls
  issuerRef:
    name: newsletters-domain-issuer
    kind: Issuer
  commonName: newsletters.domain.com
  dnsNames:
- newsletters.domain.comnewsletters-domain-middleware.yml
This file is used to create a middleware object that can intercept traffic and basically stick something in the middle. I use this one to redirect HTTP traffic to HTTPS. Some other types you can use are authentication middlewares that ask for a password.
apiVersion: traefik.containo.us/v1alpha1
kind: Middleware
metadata:
  name: https-only
  namespace: newsletters
spec:
  redirectScheme:
    scheme: https
    permanent: true
newsletters-domain-service.yml
This file is used to create the service which manages our application.
apiVersion: v1
kind: Service
metadata:
  namespace: newsletters
  name: 'newsletters-production-domain'
spec:
  type: ClusterIP
  ports:
    - protocol: TCP
      name: http
      port: 80
      targetPort: 80
    - protocol: TCP
      name: https
      port: 443
      targetPort: 80
  selector:
    app: 'newsletters-production-domain'
newsletters-domain.yml
In this file we specify what the container shall hold. It will create a ReplicaSet, and in this case it will start with our specified Docker file (that will be created in an earlier build step). If you run into an issue with this step where it mentions something like the following:
rpc error: code = Unknown desc = Error response from daemon: toomanyrequests: You have reached your pull rate limit.
It just means that you have queried the docker hub website too many times and will have to wait for another 6 hours (100 pulls per 6 hours) or you will have to verify yourself on the platform. This issue should only happen if something went wrong and the pod kept trying to restart. If it happens, kill the pod and wait 6 hours. You can do so with the following command:
kubectl delete pod <pod-name> -n newslettersapiVersion: apps/v1
kind: Deployment
metadata:
namespace: newsletters
name: 'newsletters-production-domain'
labels:
app: 'newsletters-production-domain'
tier: 'frontend'
spec:
replicas: 1
selector:
matchLabels:
app: 'newsletters-production-domain'
template:
metadata:
labels:
app: 'newsletters-production-domain'
spec:
containers:
- name: newsletters-production-domain-container
image: gitlab.domain.com:5050/path/tp/sendy-repo:5.2.3
imagePullPolicy: Always
ports:
- containerPort: 80
envFrom:
- secretRef:
name: newsletters-secret-production
imagePullSecrets:
- name: registry-credentials
newsletters-secret-production.yml
This is the unencrypted version of the password secret file. This is also in the .gitignore file and should not be uploaded to your repo, as base64 is not secure for passwords. Instead we will encrypt with SealedSecrets and upload that file. Be sure to add the details you generated with base64 into this file first.
apiVersion: v1
kind: Secret
metadata:
  name: newsletters-secret-production
  namespace: newsletters
type: Opaque
data:
  SENDY_FQDN: ZXhhbXBsZQo=
  MYSQL_HOST: ZXhhbXBsZWV4YW1wbGUK
  MYSQL_DATABASE: c2VuZHk=
  MYSQL_USER: c2VuZHk=
  MYSQL_PASSWORD: ZXhhbXBsZWV4YW1wbGVleGFtcGxlCg==
SENDY_PROTOCOL: aHR0cHMKTo encrypt the file you can run the following command within your sendy root folder:
kubeseal < ./production/newsletters-secret-production.yml --cert ../../secrets/sealed-secrets/secrets/production/cert.pem -o yaml > ./production/newsletters-secret-production-encrypted.ymlYou should now see a generated file called newsletters-secret-production-encrypted.yml within your production folder. This is the file that will be uploaded to your repo and used in the deployment. When the container starts up (during deployment) these variables will be added as env (environment) variables. The docker image will use them inside the container when installing different things.
In the root of your project folder you should create a .gitignore file. This will contain which files not to submit to your repo, we only want to upload the encrypted versions of the credentials files!
.gitignore
/staging/newsletters-secret-staging.yml
/staging/.staging-docker-config.json
/staging/staging-registry-credentials.yml
/production/newsletters-secret-production.yml
/production/.production-docker-config.json
/production/production-registry-credentials.ymlThe Newsletter
Sign up to get a monthly email about my coding journey and receive exclusive access to unpublished material and resources.
CI/CD
For my CI/CD I use Gitlab, you can use others like Jenkins, you just need to replace my gitlab-ci.yml with your own. Ensure your LoadBalancers IP addresses for each of your environments (staging & production) are set for your domain records via your domain providers website (staging.domain.com & domain.com).
Now we need to go and make our gitlab-ci.yml file so that GitLab can detect it and run through the different deployment stages that we define. If you don't use GitLab then you can just deploy the files individually from the command line.
On deploy, I let my staging deployments run automatically, but I set each of my production deployment stages to require a manual button click. Maybe I'm just over cautious, but I like the extra control.
Top section of the gitlab-ci.yml file:
services:
 - docker:18-dind

variables:
  IMAGE_VERSION: "3.5.4"
  STAGING_CREATE_DOCKER_IMAGE: "true" // set to either true, or false
  STAGING_DEPLOY_TYPE: "install" // set to either install, upgrade or nothing
  PRODUCTION_DEPLOY_TYPE: "install" // set to either install, upgrade or nothing

stages:
  - prepare-namespace-staging
  - prepare-staging
  - secret-staging
  - staging-registry-credentials-encrypted
  - create-docker-image-staging
  - deploy-staging
  - ingress-staging
  - cert-manager-staging
  - prepare-namespace-production
  - prepare-production
  - secret-production
  - production-registry-credentials
  - deploy-production
  - ingress-production
- cert-manager-productionThe bottom section of the gitlab-ci.yml file which contains the stages:
prepare-namespace-staging:
  image:
    name: 'dtzar/helm-kubectl:$IMAGE_VERSION'
    entrypoint: ["/bin/sh", "-c"]
  stage: prepare-namespace-staging
  environment:
    name: staging
  script:
    - echo ${CI_JOB_NAME}
    - kubectl version
    - if [ "$STAGING_DEPLOY_TYPE" == "install" ]; then kubectl create namespace newsletters; fi
  allow_failure: true


prepare-staging:
  image:
    name: 'dtzar/helm-kubectl:$IMAGE_VERSION'
    entrypoint: ["/bin/sh", "-c"]
  stage: prepare-staging
  environment:
    name: staging
    kubernetes:
      namespace: newsletters
  script:
    - echo ${CI_JOB_NAME}
    - kubectl version
    - if [ "$STAGING_DEPLOY_TYPE" == "install" ]; then kubectl delete deployment newsletters-staging-domain -n newsletters; fi
    - if [ "$STAGING_DEPLOY_TYPE" == "install" ]; then kubectl delete service newsletters-domain  -n newsletters; fi
  allow_failure: true


secret-staging:
  image:
    name: 'dtzar/helm-kubectl:$IMAGE_VERSION'
    entrypoint: ["/bin/sh", "-c"]
  stage: secret-staging
  environment:
    name: staging
    kubernetes:
      namespace: newsletters
  script:
    - echo ${CI_JOB_NAME}
    - kubectl version
    - kubectl apply -f staging/newsletters-secret-staging-encrypted.yml


staging-registry-credentials-encrypted:
  image:
    name: 'dtzar/helm-kubectl:$IMAGE_VERSION'
    entrypoint: ["/bin/sh", "-c"]
  stage: staging-registry-credentials-encrypted
  environment:
    name: staging
    kubernetes:
      namespace: newsletters
  script:
    - echo ${CI_JOB_NAME}
    - kubectl version
    - kubectl apply -f staging/staging-registry-credentials-encrypted.yml


create-docker-image-staging:
  image:
    name: gcr.io/kaniko-project/executor:debug
    entrypoint: [""]
  stage: create-docker-image-staging
  script:
    - if [ "$STAGING_CREATE_DOCKER_IMAGE" == "true" ]; then  mkdir -p /kaniko/.docker; fi
    - if [ "$STAGING_CREATE_DOCKER_IMAGE" == "true" ]; then  echo "{\"auths\":{\"$CI_REGISTRY\":{\"username\":\"$CI_REGISTRY_USER\",\"password\":\"$CI_REGISTRY_PASSWORD\"}}}" > /kaniko/.docker/config.json; fi
    - if [ "$STAGING_CREATE_DOCKER_IMAGE" == "true" ]; then /kaniko/executor --context $CI_PROJECT_DIR/docker --dockerfile $CI_PROJECT_DIR/docker/Dockerfile --destination $CI_REGISTRY_IMAGE:5.2.3; fi
    - echo {$CI_REGISTRY_IMAGE:5.2.3}


deploy-staging:
  image:
    name: 'dtzar/helm-kubectl:$IMAGE_VERSION'
    entrypoint: ["/bin/sh", "-c"]
  stage: deploy-staging
  environment:
    name: staging
    kubernetes:
      namespace: newsletters
  script:
    - echo ${CI_JOB_NAME}
    - kubectl version
    - if [ "$STAGING_DEPLOY_TYPE" == "install" ]; then kubectl apply -f staging/newsletters-staging-domain.yml; fi
    - if [ "$STAGING_DEPLOY_TYPE" == "install" ]; then kubectl apply -f staging/newsletters-staging-domain-service.yml; fi


ingress-staging:
  image:
    name: 'dtzar/helm-kubectl:$IMAGE_VERSION'
    entrypoint: ["/bin/sh", "-c"]
  stage: ingress-staging
  environment:
    name: staging
    kubernetes:
      namespace: newsletters
  script:
    - if [ "$STAGING_DEPLOY_TYPE" == "install" ]; then kubectl apply -f staging/newsletters-staging-domain-ingress-route.yml; fi
    - if [ "$STAGING_DEPLOY_TYPE" == "install" ]; then kubectl apply -f staging/newsletters-staging-domain-secure-ingress-route.yml; fi
    - if [ "$STAGING_DEPLOY_TYPE" == "install" ]; then kubectl apply -f staging/newsletters-staging-domain-middleware.yml; fi


cert-manager-staging:
  image:
    name: 'dtzar/helm-kubectl:$IMAGE_VERSION'
    entrypoint: ["/bin/sh", "-c"]
  stage: cert-manager-staging
  environment:
    name: staging
    kubernetes:
      namespace: newsletters
  script:
    - echo ${CI_JOB_NAME}
    - kubectl version
    - if [ "$STAGING_DEPLOY_TYPE" == "install" ]; then kubectl apply -f staging/newsletters-staging-domain-issuer.yml; fi
    - if [ "$STAGING_DEPLOY_TYPE" == "install" ]; then kubectl apply -f staging/newsletters-staging-domain-solver.yml; fi


prepare-namespace-production:
  image:
    name: 'dtzar/helm-kubectl:$IMAGE_VERSION'
    entrypoint: ["/bin/sh", "-c"]
  stage: prepare-namespace-production
  environment:
    name: production
  when: manual
  script:
    - echo ${CI_JOB_NAME}
    - kubectl version
    - if [ "$PRODUCTION_DEPLOY_TYPE" == "install" ]; then kubectl create namespace newsletters; fi
  allow_failure: true


prepare-production:
  image:
    name: 'dtzar/helm-kubectl:$IMAGE_VERSION'
    entrypoint: ["/bin/sh", "-c"]
  stage: prepare-production
  environment:
    name: production
    kubernetes:
      namespace: newsletters
  when: manual
  script:
    - echo ${CI_JOB_NAME}
    - kubectl version
    - if [ "$PRODUCTION_DEPLOY_TYPE" == "install" ]; then kubectl delete replicaset newsletters-domain -n newsletters; fi
    - if [ "$PRODUCTION_DEPLOY_TYPE" == "install" ]; then kubectl delete replicaset newsletters-domain -n newsletters; fi
    - if [ "$PRODUCTION_DEPLOY_TYPE" == "install" ]; then kubectl delete service newsletters-domain -n newsletters; fi
  allow_failure: true


secret-production:
  image:
    name: 'dtzar/helm-kubectl:$IMAGE_VERSION'
    entrypoint: ["/bin/sh", "-c"]
  stage: secret-production
  environment:
    name: production
    kubernetes:
      namespace: newsletters
  script:
    - echo ${CI_JOB_NAME}
    - kubectl version
    - kubectl apply -f staging/newsletters-secret-production-encrypted.yml


production-registry-credentials:
  image:
    name: 'dtzar/helm-kubectl:$IMAGE_VERSION'
    entrypoint: ["/bin/sh", "-c"]
  stage: production-registry-credentials
  environment:
    name: production
    kubernetes:
      namespace: newsletters
  script:
    - echo ${CI_JOB_NAME}
    - kubectl version
    - kubectl apply -f production/production-registry-credentials-encrypted.yml


deploy-production:
  image:
    name: 'dtzar/helm-kubectl:$IMAGE_VERSION'
    entrypoint: ["/bin/sh", "-c"]
  stage: deploy-production
  environment:
    name: production
    kubernetes:
      namespace: newsletters
  when: manual
  script:
    - echo ${CI_JOB_NAME}
    - kubectl version
    - if [ "$PRODUCTION_DEPLOY_TYPE" == "install" ]; then kubectl apply -f production/newsletters-domain.yml; fi
    - if [ "$PRODUCTION_DEPLOY_TYPE" == "install" ]; then kubectl apply -f production/newsletters-domain-service.yml; fi


ingress-production:
  image:
    name: 'dtzar/helm-kubectl:$IMAGE_VERSION'
    entrypoint: ["/bin/sh", "-c"]
  stage: ingress-production
  environment:
    name: production
    kubernetes:
      namespace: newsletters
  when: manual
  script:
    - if [ "$PRODUCTION_DEPLOY_TYPE" == "install" ]; then kubectl apply -f production/newsletters-domain-ingress-route.yml; fi
    - if [ "$PRODUCTION_DEPLOY_TYPE" == "install" ]; then kubectl apply -f production/newsletters-domain-secure-ingress-route.yml; fi
    - if [ "$PRODUCTION_DEPLOY_TYPE" == "install" ]; then kubectl apply -f production/newsletters-domain-middleware.yml; fi


cert-manager-production:
  image:
    name: 'dtzar/helm-kubectl:$IMAGE_VERSION'
    entrypoint: ["/bin/sh", "-c"]
  stage: cert-manager-production
  environment:
    name: production
    kubernetes:
      namespace: newsletters
  when: manual
  script:
    - echo ${CI_JOB_NAME}
    - kubectl version
    - if [ "$PRODUCTION_DEPLOY_TYPE" == "install" ]; then kubectl apply -f production/newsletters-domain-issuer.yml; fi
    - if [ "$PRODUCTION_DEPLOY_TYPE" == "install" ]; then kubectl apply -f production/newsletters-domain-solver.yml; fi
Whenever you deploy the gitlab-ci.yml file, the build script will run. So ensure you have everything in order before you commit that file in particular, or set the top variables to 'false'.
As you can see one of the stages in the list of staging builds is called: create-docker-image. This stage will create a docker image from the provided docker folder that we have in the root of our repository. This will be used by both the deploy-staging and deploy-production stages.
In the deploy-staging and deploy-production stages they will create a container that will be hosted inside a pod. These pods will use the image dtzar/helm-kubectl with our specified version. This is a container that will let us use helm and kubectl commands inside, should we need to remote into the pod later. I generally use this image for other projects where I install helm charts.
If you get an error like the following at one of these stages:
 Back-off pulling image "gitlab.domain.com:5050/path/to/sendy-repo:5.2.3"
  Normal   Pulling         6m45s (x3 over 7m21s)  kubelet            Pulling image "gitlab.domain.com:5050/path/to/sendy-repo:5.2.3"
  Warning  Failed          6m45s (x3 over 7m21s)  kubelet            Failed to pull image "gitlab.domain.com:5050/path/to/sendy-repo:5.2.3": rpc error: code = Unknown desc = Error response from daemon: Get https://gitlab.domain.com:5050/v2/path/to/sendy-repo/manifests/5.2.3: denied: access forbidden
  Warning  Failed          6m45s (x3 over 7m21s)  kubelet            Error: ErrImagePull
Warning Failed 2m9s (x26 over 7m18s) kubelet Error: ImagePullBackOffIt generally means that the credentials you encoded and encrypted for your image repository are wrong. You need to ensure you encrypt these details separately for both your staging and production clusters with different cert.pem files.
Be sure to delete your old ones if you get this error:
kubectl delete sealedsecret <secret-name> -n namespaceAnd then go through the encode and encrypt procedure again, and do:
kubectl apply -f production/production-registry-credentials-encrypted.ymlNow you can delete the failing pod and it should be restarted automatically and detect the correct credentials:
kubectl delete pod <pod-name> -n newsletters

pod "<pod-name>" deletedNow if the pod gives a new warning, it is most likely because it has been pulling the dtzar/helm-kubectl image from docker hub, failing at accessing our own image repository, and then trying again and again. So docker limits you at 100 pulls per 6 hours for unverified accounts. Either verify yourself, or go for a very long walk.
Deployment Process
So let's get the party started. If you are sure all the others files are already committed (git status or checking your repo might help you), you can deploy this file from your terminal. If you already deployed it once and want to redeploy the stages, just make a change, save the file and then continue below:
git add .gitlab-ci.yml
git commit -m "deploying gitlab file"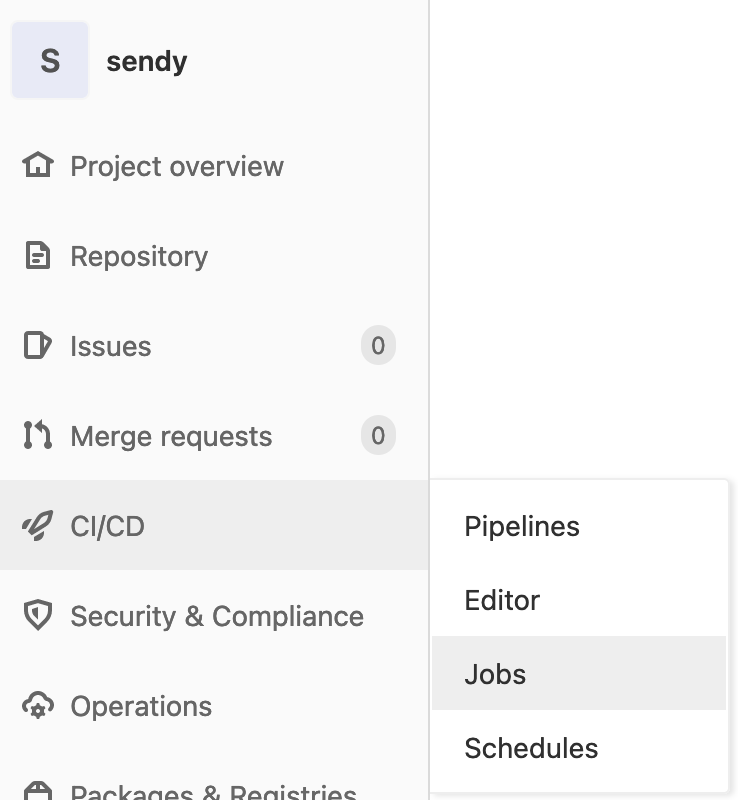
git pushNow the fun begins. Head on over to your Gitlab project page and click on the CI/CD jobs section:
Once in there you might see that your job has started. If not it might be an issue with your GitLab Runners, so ensure they are configured correctly (or updated).
Before my production stages, I ran my staging stages. My staging stages all run automatically when Gitlab detects that my gitlab-ci.yml file has been changed. One of the staging stages is create-docker-image-staging which creates the docker image that will be used for both staging and production. Just be aware that this should be run before the production stages start!
When a job runs it will look something like this (it will show pending first, until an available runner is found to pick up the job:

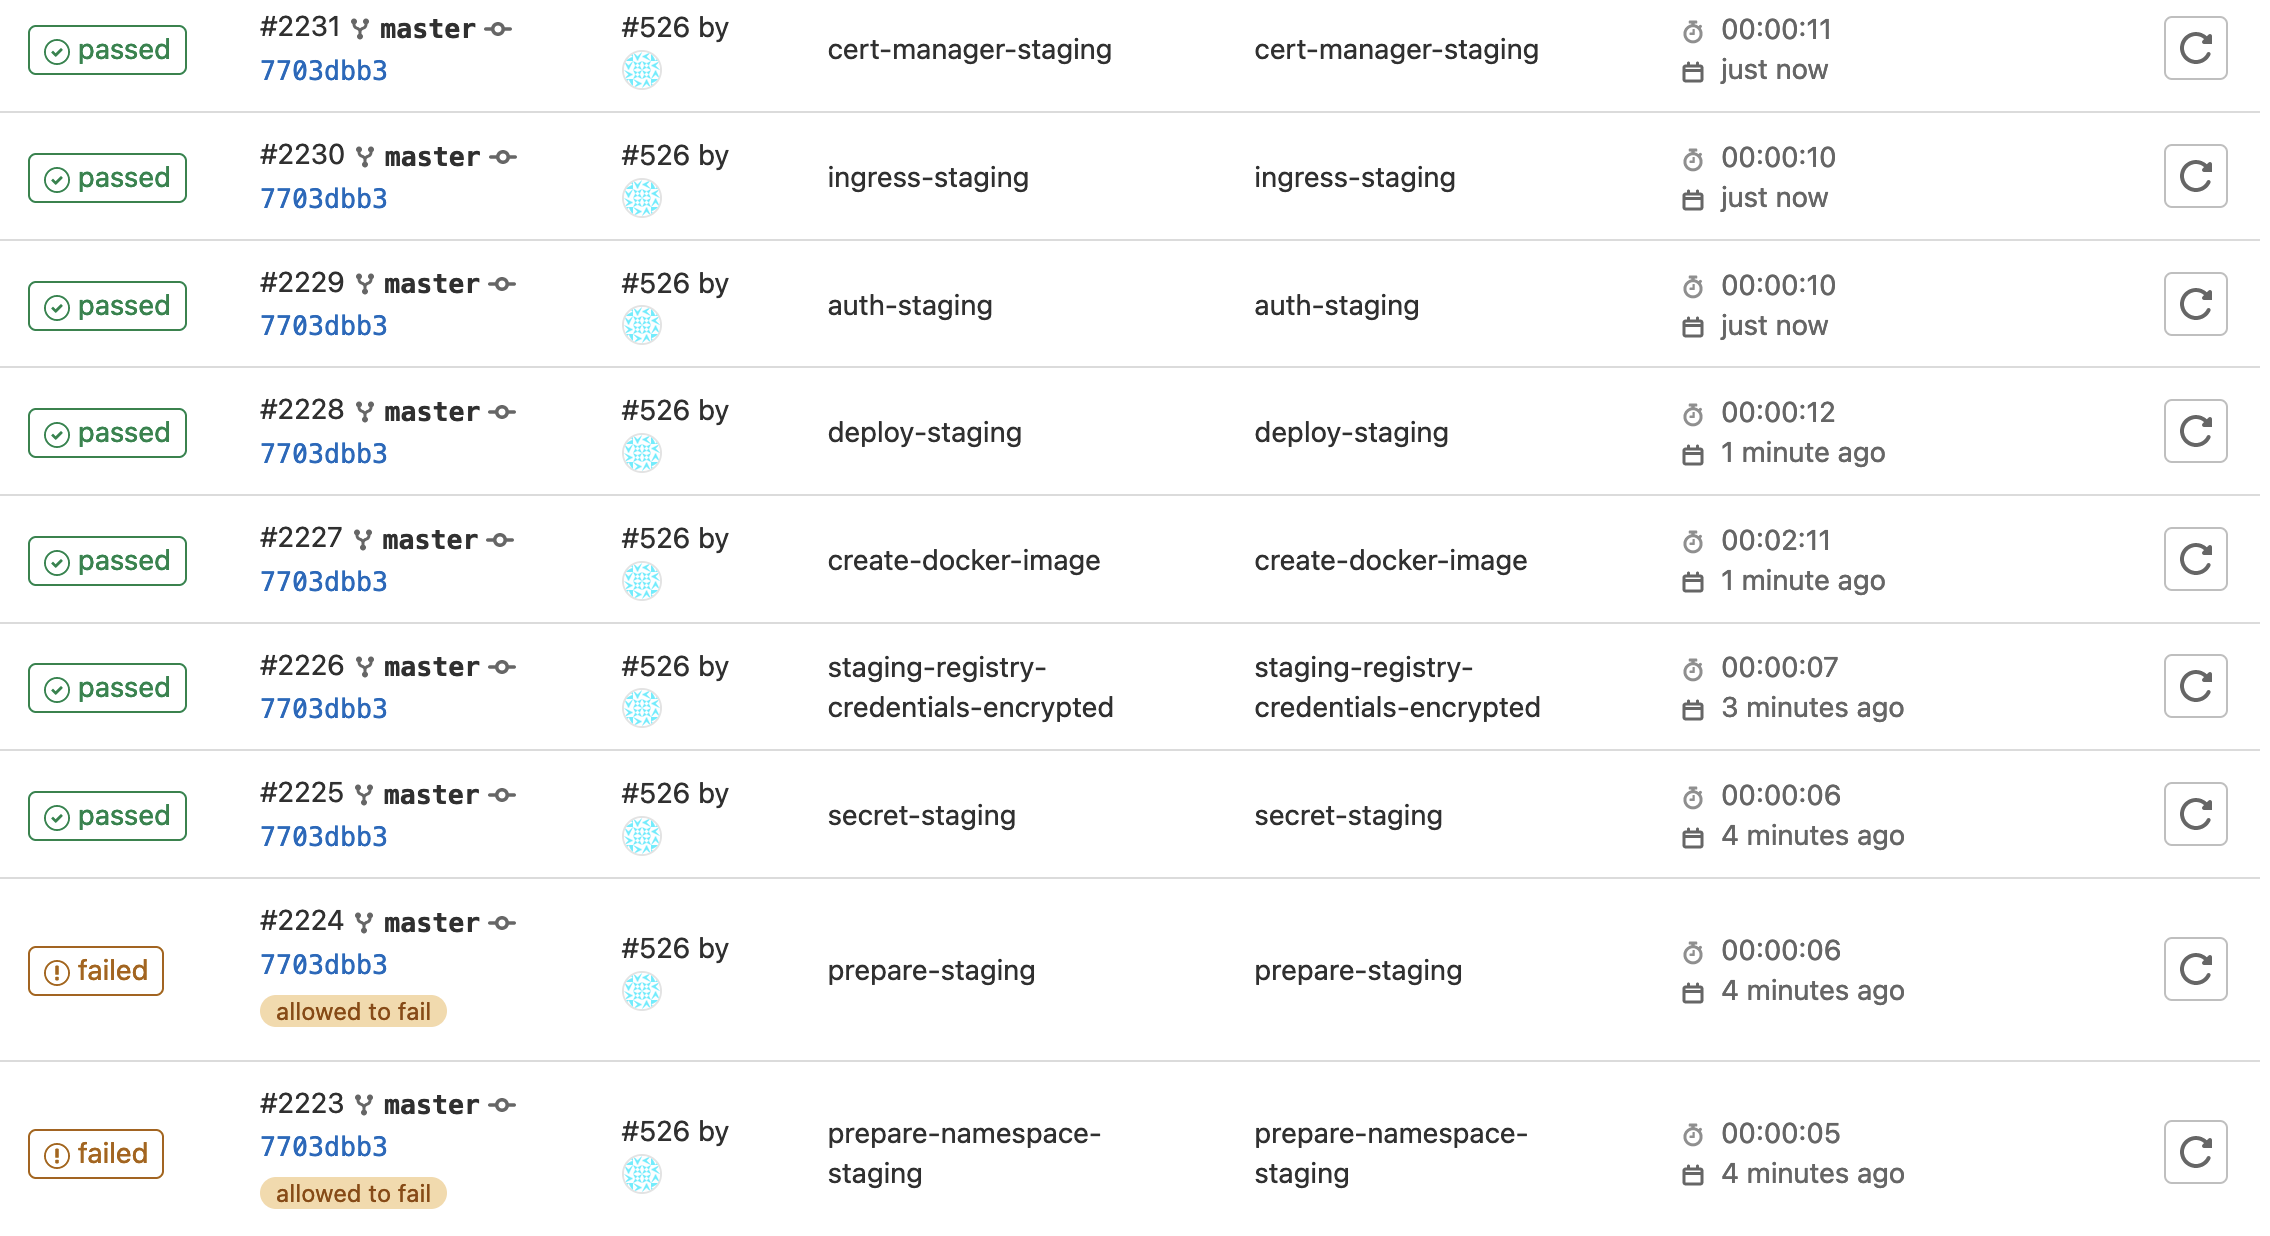
Here is what my staging stages looked like when complete. Notice the first two stages at the bottom failed, this is normal as they are set to fail and continue if the namespace already exists, and if the applications do not already exist to be deleted. Yours might differ depending on if this this your first run:
Here is what the prepare-namespace-staging job shows if you would have clicked into it:

So here is what happened for each of my production stages (remember it's production so they had to be triggered manually):
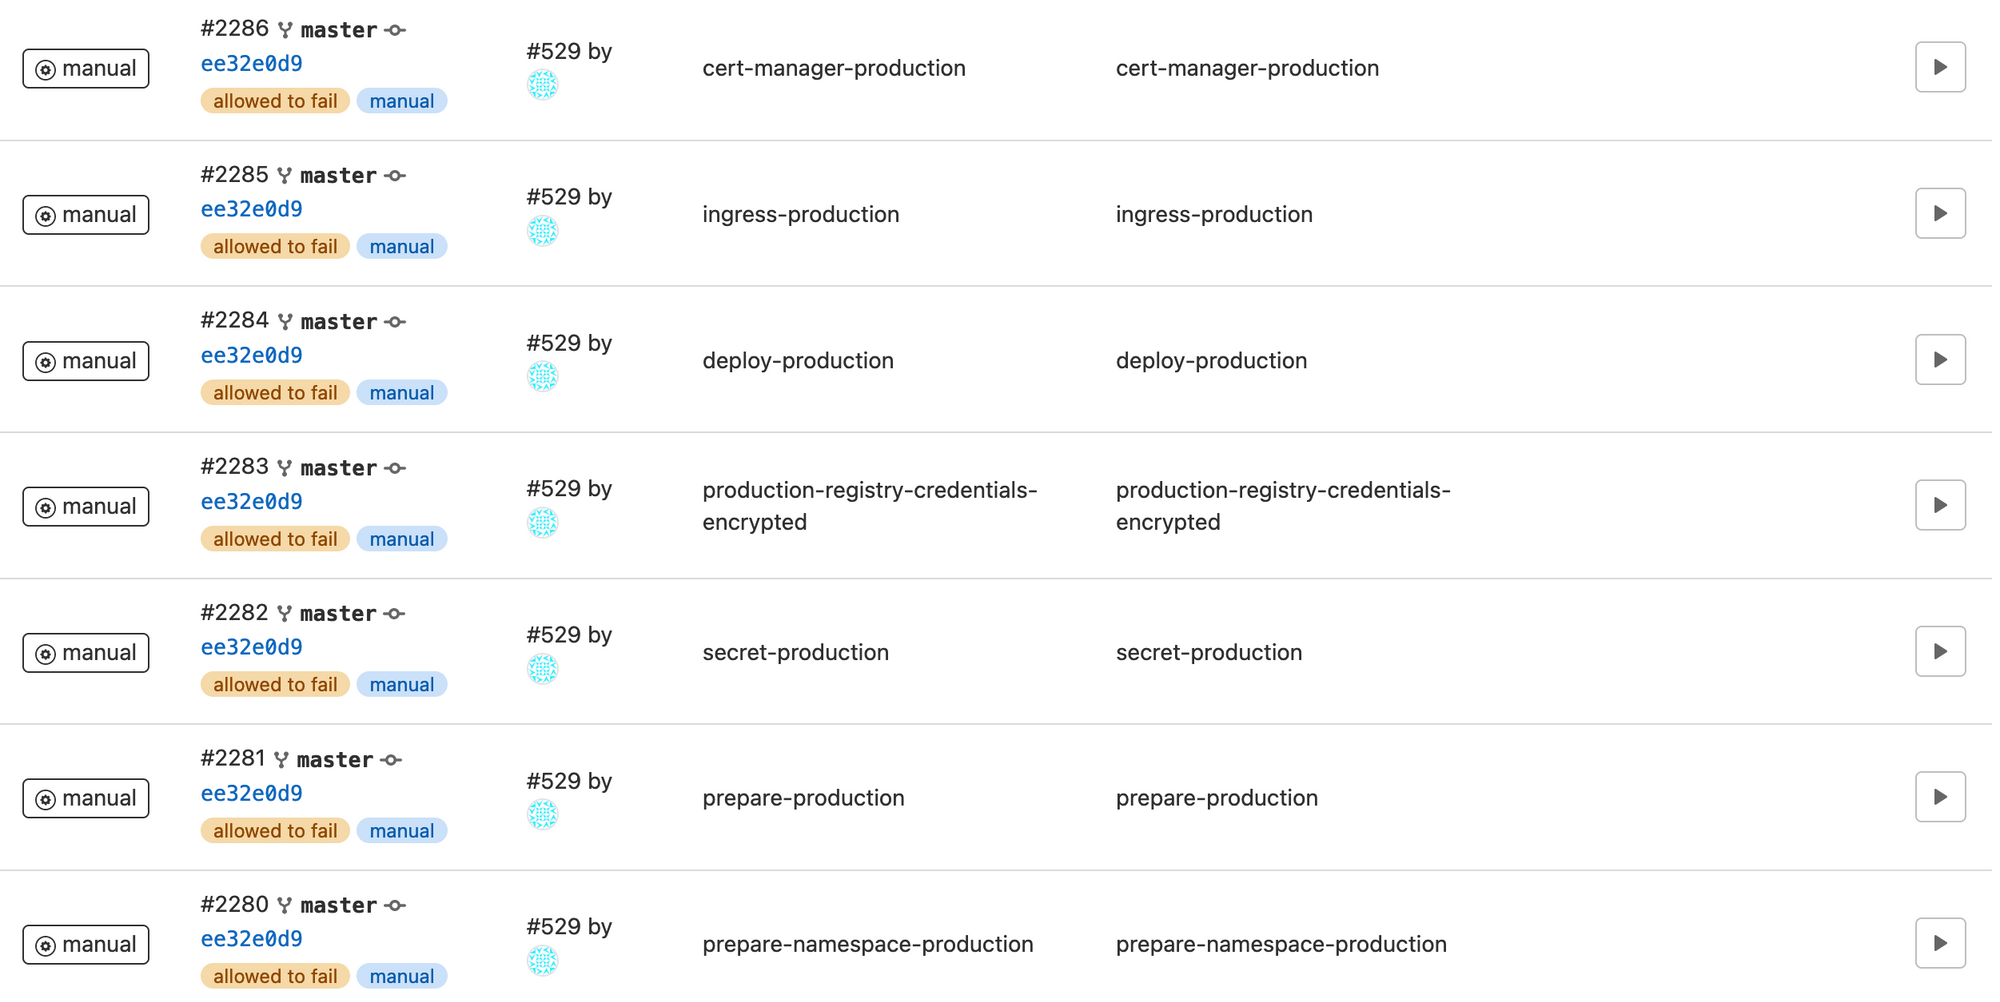
prepare-namespace-production

prepare-production

secret-production

production-registry-credentials-encrypted

deploy-production

ingress-production
cert-manager-production
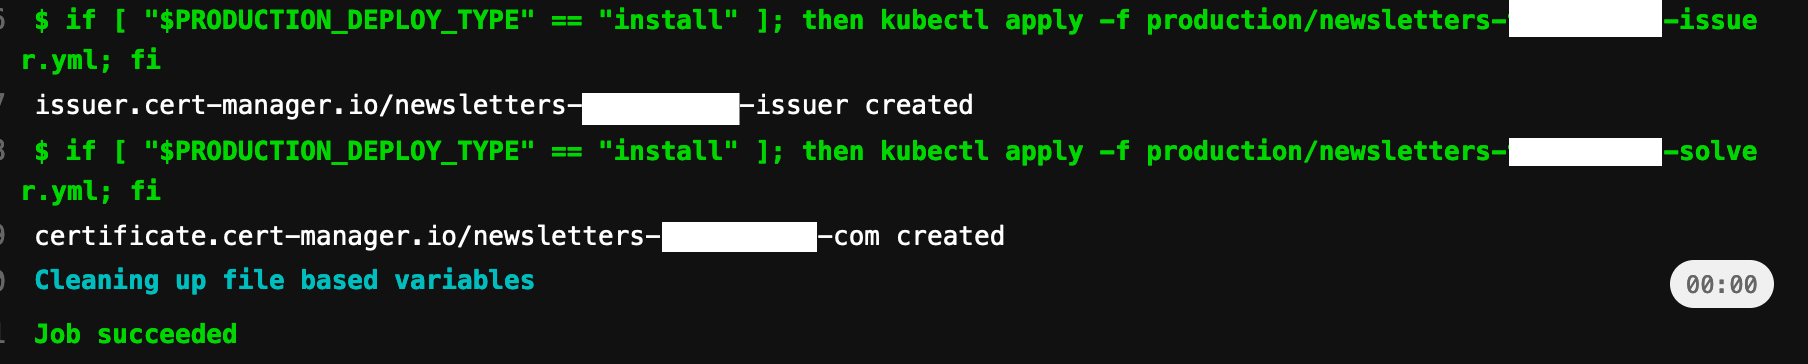
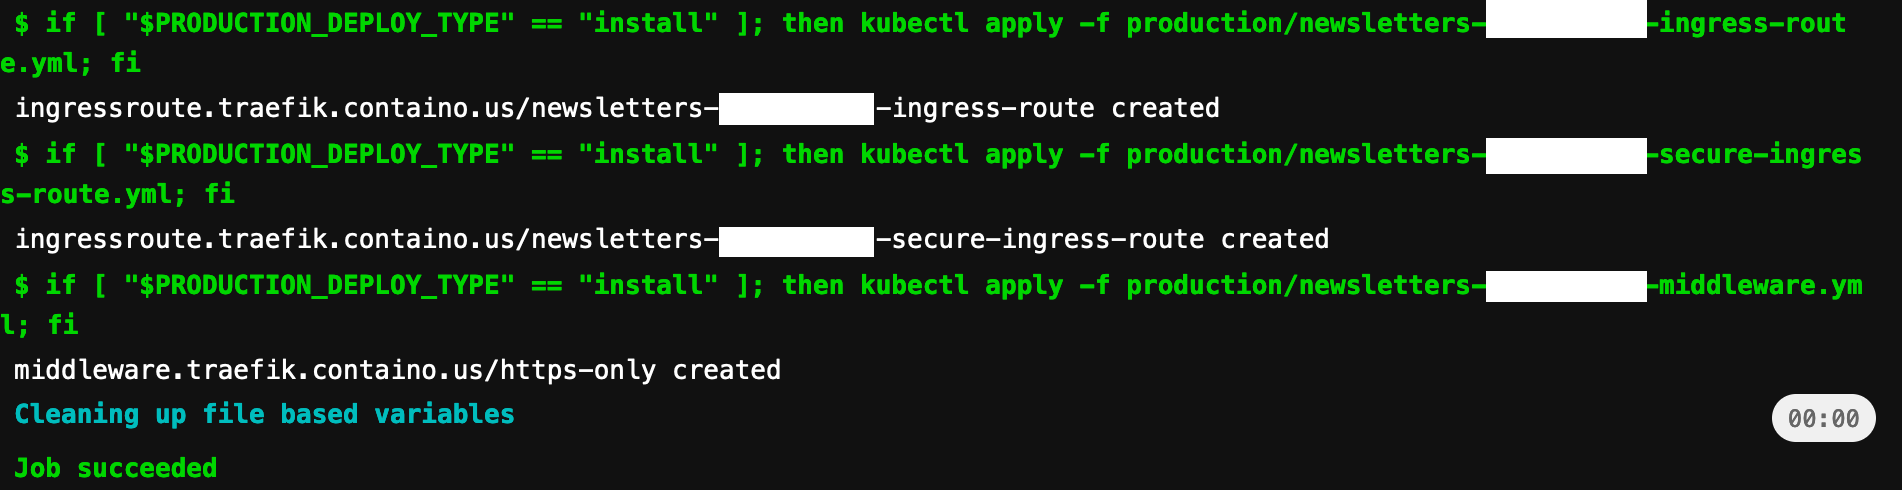
Once all the stages have deployed correctly we will wait a few moments for our cert manager to complete the certification validation procedure. Then we can can go to the installation page (put in your domain):
https://newsletters.example.com/_install.php
If it works, then great! If not, you should run the following command on your cluster to see what is running:
kubectl get all -n newslettersNow you can run:
kubectl logs <podname> -n newslettersThe logs should give you some insights into what is preventing the pod from starting successfully.
On your installation page you should see the following:
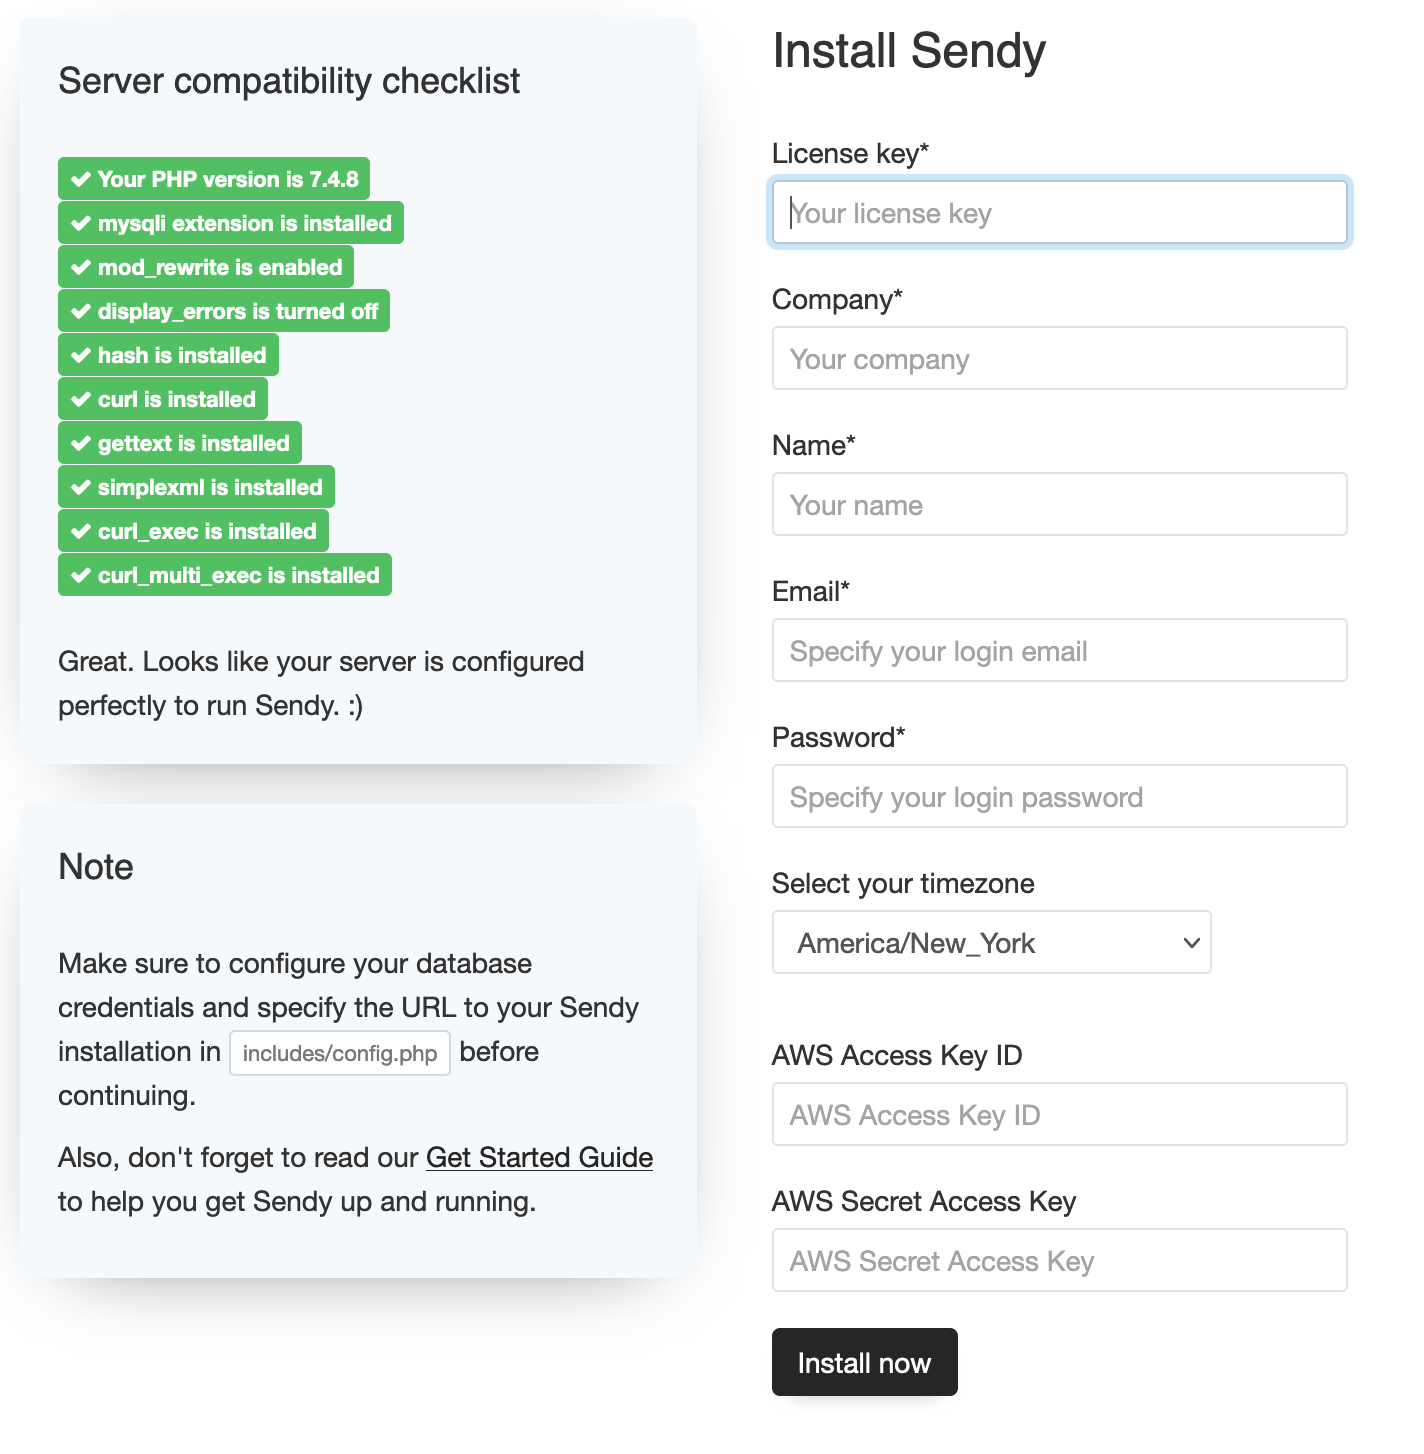
Fill out these fields using new values that you wish to use for your admin login. The AWS access and secret access key can be found from your Amazon SES account.
If you messed up somewhere and wish to just clear the Sendy database to a fresh state and restart the installation procedure you can log into your database using the methods provided at the start of the article and run these commands in the SQL section:
DROP TABLE IF EXISTS `apps`;
DROP TABLE IF EXISTS `ares`;
DROP TABLE IF EXISTS `ares_emails`;
DROP TABLE IF EXISTS `blocked_domains`;
DROP TABLE IF EXISTS `campaigns`;
DROP TABLE IF EXISTS `links`;
DROP TABLE IF EXISTS `lists`;
DROP TABLE IF EXISTS `login`;
DROP TABLE IF EXISTS `queue`;
DROP TABLE IF EXISTS `rules`;
DROP TABLE IF EXISTS `seg`;
DROP TABLE IF EXISTS `seg_cons`;
DROP TABLE IF EXISTS `skipped_emails`;
DROP TABLE IF EXISTS `subscribers`;
DROP TABLE IF EXISTS `subscribers_seg`;
DROP TABLE IF EXISTS `suppression_list`;
DROP TABLE IF EXISTS `template`;
DROP TABLE IF EXISTS `webhooks_log`;
DROP TABLE IF EXISTS `zapier`;Amazon SES
Amazon SES (Simple Email Service) is a simple and cost-effective solution that enables you to send emails within your application. So you need to set up an account first! You can do so here.
Set up an Amazon AWS account and configure SES.
Here is a video guide for you to follow:
Once you've created your IAM credentials, copy and paste them into the installation page or your Sendy settings (under Amazon Web Services Credentials). Sendy will now have access to send your emails via Amazon SES and also to setup bounces and handle complaints with Amazon SNS.
Finally, you'll need to request Amazon to increase your SES Sending Limits to get your Amazon SES account out of "sandbox mode". You'll then be able to send to and from any email address as well as raise your daily sending limits from 200 per day to any number you need. You can do this after the install, or if you wish to do it now, please go your Amazon SES account and open a support case:

You should be presented with a screen that looks like this (select service limit increase):
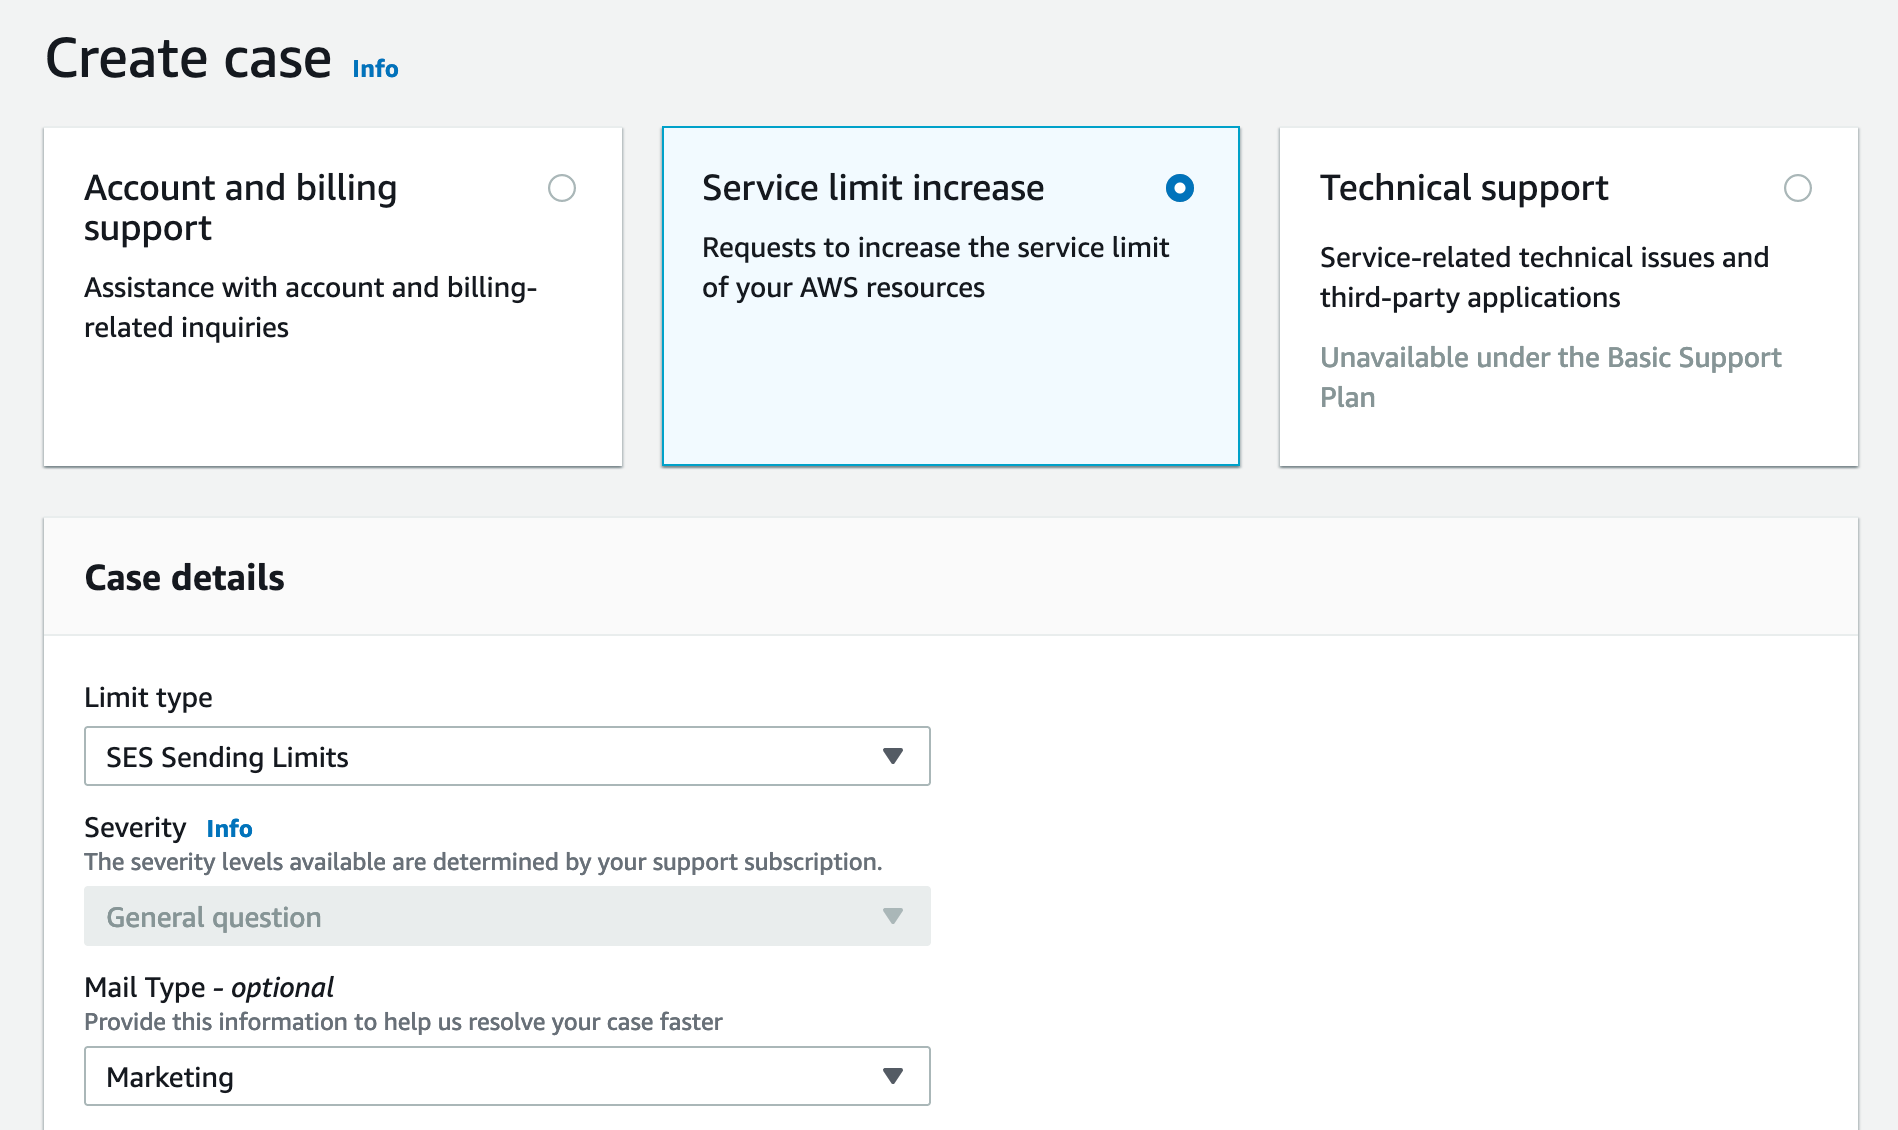
I have selected SES Sending Limits, and for the mail type I set it to "Marketing".
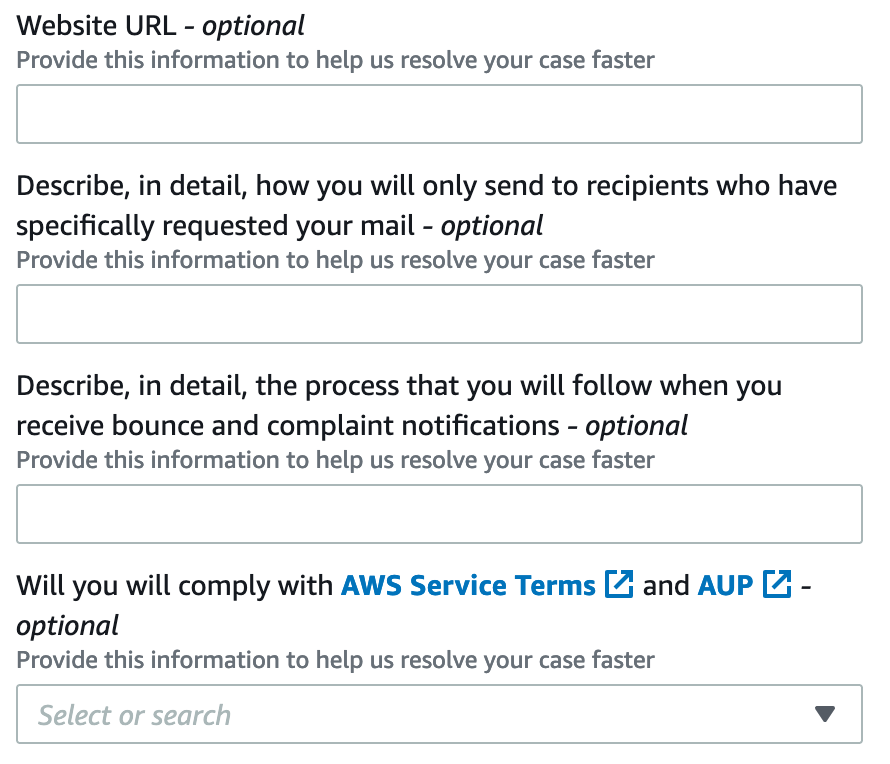
The following will show some of the information that will be requested from you. You can use the following but I would recommend you personalize it.
Website URL: https://newsletters.yourdomain.com - I decided to use one of my clients domains which was https://newsletter.domain.com for this instead of the main Sendy domain. You will learn about Sendy Clients later, so if this is something you wish to use you can just complete your Sendy installation without the AWS keys, and later add them in the Sendy settings page.
How you will send to recipients: "I will only send to recipients who have subscribed to my newsletter via an opt in on my website"
The process that you will follow when you receive bounce and complaints: "I will have a unsubscribe link on the bottom of every email to help mitigate this, I will also forward bounce complaints to my inbox to be informed of any issues."
Will you comply?: Select the yes option
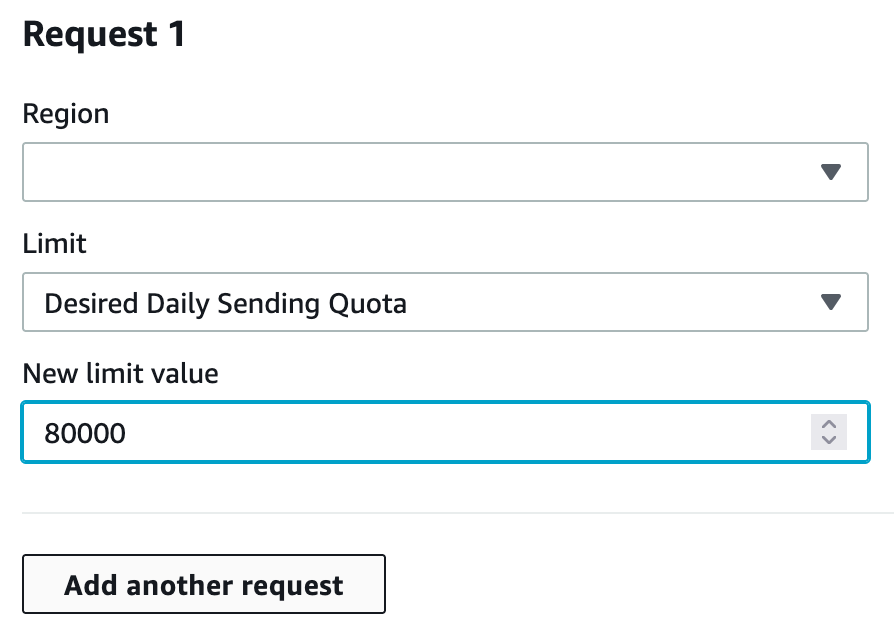
Request Section 1 (Add another request after this one)
Region: Select the region you wish to send from, this should be set in the Sendy settings also.
Limit: Select "Desired Daily Sending Quota"
New Limit Value: Set to 80,000 (they will decide if it is too high, and reduce to what they think it should be)
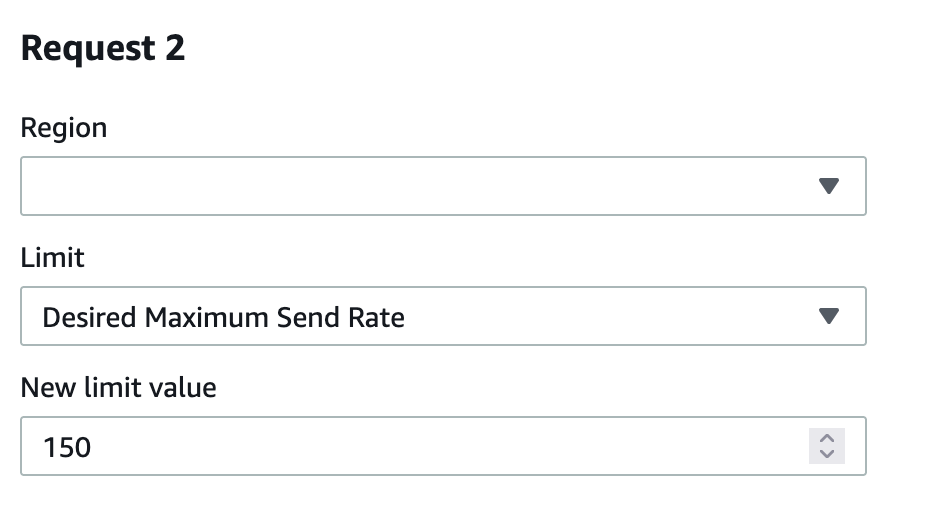
Request Section 2
Region: Select the region you wish to send from, this should be the same as in Request section 1.
Limit: Select "Desired Maximum Send Rate"
New Limit Value: 150
For the Case Description section you will have to explain what you are doing. I explain how I am setting up Amazon SES for my blog because MailChimp was too expensive. I also mentioned how I will not be sending spam and will only ever send to subscribers that have signed up to my newsletter willingly.

Install Time
So now you can click install and wait for your application to be ready. Once complete it should redirect you to your login page.
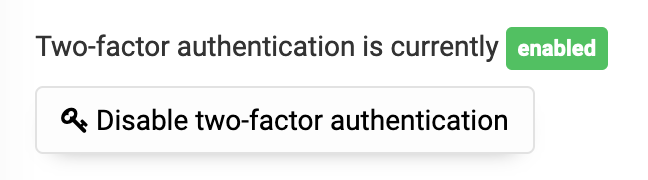
Now you can log in using the credentials you provided. The first thing you should do is go to the settings page and enable 2 factor authentication. This will prevent others from logging in without this code.
Once it is enabled it should look like this:
Sendy Clients
Sendy lets you install it on a domain, and then allows clients to have their own brand login on their own domain. This is cool because you can then charge your clients using Stripe or PayPal for sending their newsletter. Your 'clients' could also just be your own different projects. It is a nice modular design, and gives you the ability to have a different branded login portal for each client.
To create a client just go into your main installations settings page and go to the Client section.
One issue I encountered is that it tells you to set a cname in your domain providers settings page for the domain you wish to use for the client. This did not work for me, and on a random thread online they mentioned that if it did not work you would need to set an alias in your cpanel or whatever hosting interface you use.
As we are doing everything custom on our Kubernetes cluster, I had to figure out a solution. Instead of using a cname I just created another 'A record' on my client domain providers settings online. In the host field I added "newsletter" and in the value field I added my production clusters IP address (find this in at the top of the article, when we configured our main Sendy subdomain). You can also set it for your staging cluster by using "staging.newsletter" for the host and the staging clusters IP for the value.
This way when the url newsletter.clientdomain.com is used, it will redirect to my production cluster, and we will take it from there. Be aware after setting your subdomain A record, it might take some time to be updated as the details need to be propagated around the world. You can view the progress using a site such as: DNS Checker
When your subdomain is propagated, and you enter it on your browser it should now direct you to our production server. And because our Traefik LoadBalancer does not know what to do with the request it should just give you a '404 page not found' message.
So what I did was create 4 more files. Another ingress, secure-ingress, issuer and solver. These files, once deployed would tell our Traefik LoadBalancer to send the new domain to the same service that we are using for our main domain. The issuer and solver would generate a https cert to be used for our CertManager.
I stored the files in both the production and staging folders in a folder called alias. Replace clientdomain with your clients domain.
./production/alias/newsletter-clientdomain-ingress-route.yml
./production/alias/newsletter-clientdomain-secure-ingress-route.yml
./production/alias/newsletter-clientdomain-issuer.yml
./production/alias/newsletter-clientdomain-solver.yml

./staging/alias/newsletter-clientdomain-ingress-route.yml
./staging/alias/newsletter-clientdomain-secure-ingress-route.yml
./staging/alias/newsletter-clientdomain-issuer.yml
./staging/alias/newsletter-clientdomain-solver.ymlHere are the production files. You can view all the files on the repo. Remember to change the clientdomain part to the clients domain, and the maindomain to the main domain you used to install Sendy with. Be aware I used newsletter as the subdomain for my client, and newsletters for my main Sendy. This is because the main Sendy is like an admin panel for me that manages all the clients newsletters, while the client just cares about their own newsletter.
newsletter-clientdomain-ingress-route.yml
apiVersion: traefik.containo.us/v1alpha1
kind: IngressRoute
metadata:
  namespace: newsletters
  name: newsletter-clientdomain-ingress-route
annotations:
  kubernetes.io/ingress.class: "traefik"
  cert-manager.io/issuer: newsletter-clientdomain-issuer
  traefik.ingress.kubernetes.io/router.entrypoints: web
  traefik.frontend.redirect.entryPoint: https
spec:
  entryPoints:
    - web
  routes:
    - match: Host(`newsletter.clientdomain.com`)
      middlewares:
        - name: https-only
      kind: Rule
      services:
        - name: newsletters-production-maindomain
          namespace: newsletters
          port: 80
newsletter-clientdomain-secure-ingress-route.yml
apiVersion: traefik.containo.us/v1alpha1
kind: IngressRoute
metadata:
  namespace: newsletters
  name: newsletter-clientdomain-secure-ingress-route
annotations:
  kubernetes.io/ingress.class: "traefik"
  cert-manager.io/issuer: newsletter-clientdomain-issuer
  traefik.ingress.kubernetes.io/router.entrypoints: websecure
  traefik.frontend.redirect.entryPoint: https
spec:
  entryPoints:
    - websecure
  routes:
    - match: Host(`newsletter.clientdomain.com`)
      kind: Rule
      services:
        - name: newsletters-production-maindomain
          namespace: newsletters
          port: 80
  tls:
    domains:
    - main: newsletter.clientdomain.com
    options:
      namespace: newsletters
    secretName: newsletter-clientdomain-com-tls
newsletter-clientdomain-issuer.yml
apiVersion: cert-manager.io/v1
kind: Issuer
metadata:
  name: newsletter-clientdomain-issuer
  namespace: newsletters
spec:
  acme:
    server: https://acme-v02.api.letsencrypt.org/directory
    email: letsencrypt@maindomain.com
    privateKeySecretRef:
      name: newsletter-clientdomain-com-tls-letsencrypt
    solvers:
    - http01:
        ingress:
          class: traefik
newsletter-clientdomain-solver.yml
apiVersion: cert-manager.io/v1
kind: Certificate
metadata:
  name: newsletter-clientdomain-com
  namespace: newsletters
spec:
  secretName: newsletter-clientdomain-com-tls
  issuerRef:
    name: newsletter-clientdomain-issuer
    kind: Issuer
  commonName: newsletter.clientdomain.com
  dnsNames:
- newsletter.clientdomain.comI decided to not add these files to my .gitlab-ci.yml file, so they have to be deployed manually:
kubectl apply -f production/alias/newsletter-clientdomain-issuer.yml
kubectl apply -f production/alias/newsletter-clientdomain-solver.yml
kubectl apply -f production/alias/newsletter-clientdomain-secure-ingress-route.yml
kubectl apply -f production/alias/newsletter-clientdomain-ingress-route.yml In the client settings you need to ensure to change it from http to https, or else you will get some ssl errors when you visit the client login page.
You can check if the https has been issued by letsencrypt by running:
kubectl get ingressroutes -n newsletters If you wish to debug the cert issuance, you can do this to see the information:
kubectl describe ingressroute newsletter-clientdomain-secure-ingress-route -n newsletters
Once the cert is generated (wait a few minutes) you/your client should be able to log in on the clients domain via: https://newsletter.clientdomain.com
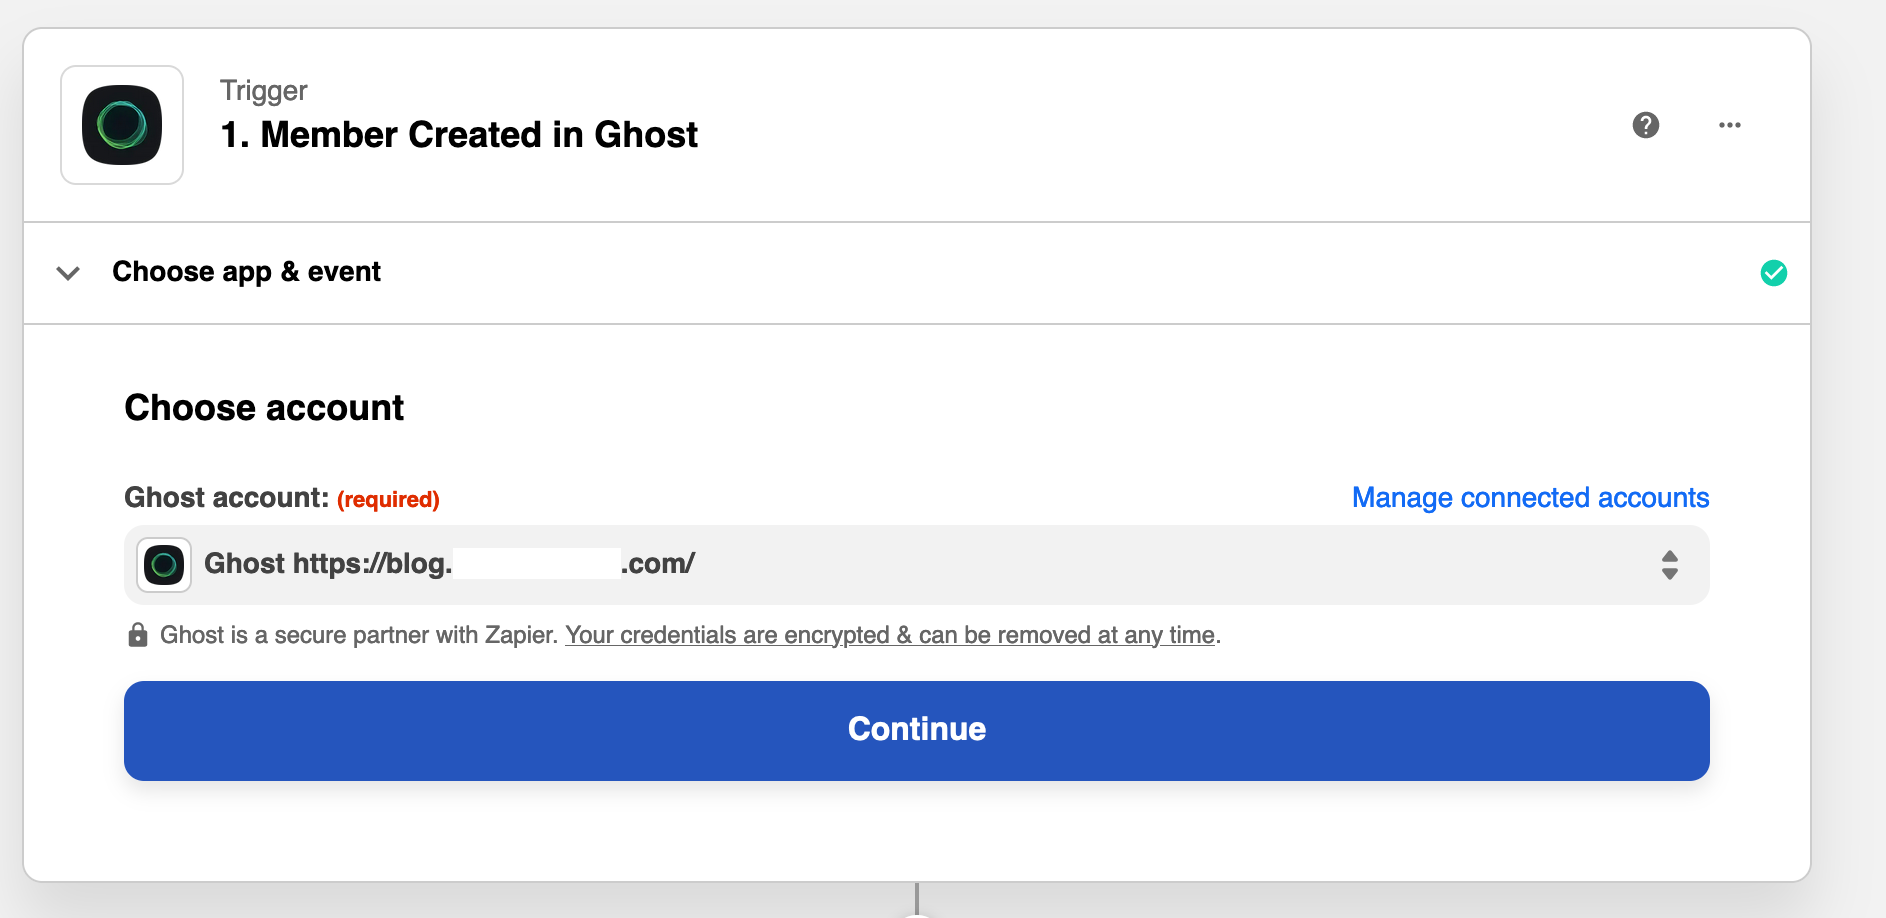
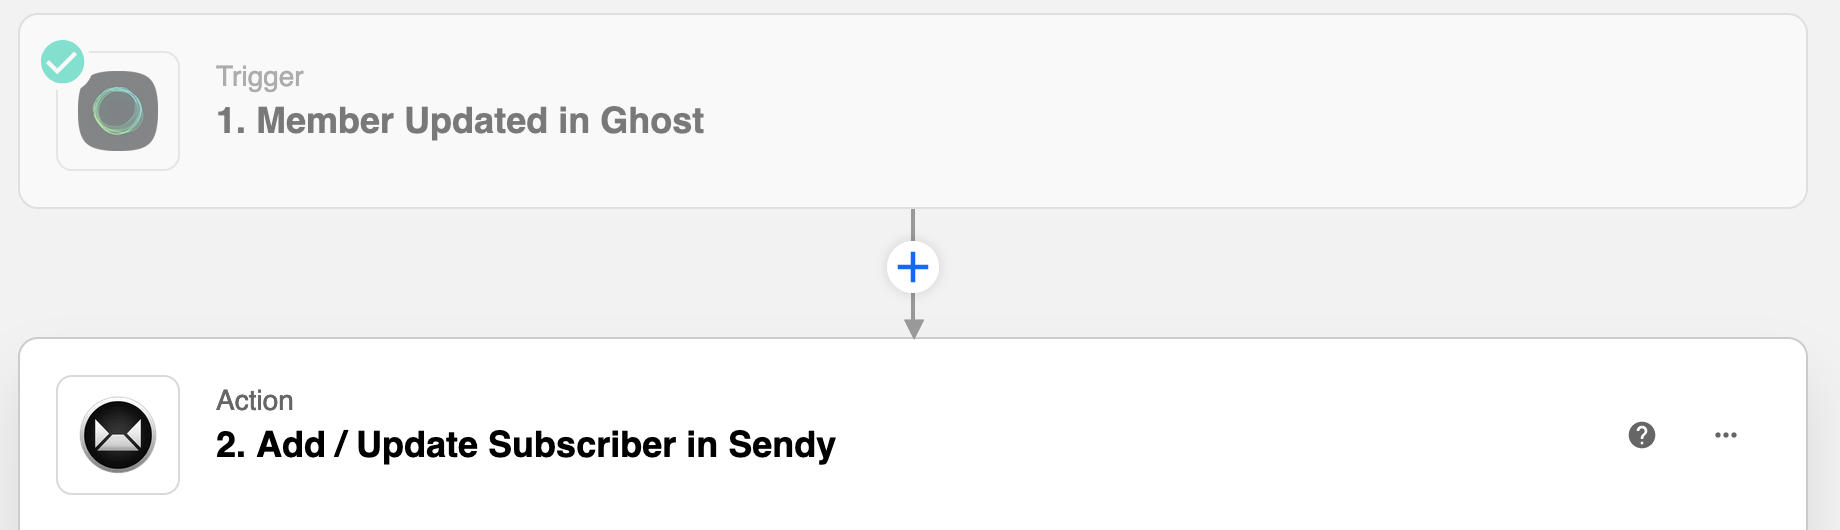
Zap Zap
Now we are finally back at the start with the issue that caused me to look for an alternative solution. How can we make it so that when a new user signs up, they are added to the newsletters list (which is now in Sendy). Now, we can connect the Zapier integration between Sendy and Ghost.
Here are the actions that are needed:
Member created on Ghost blog = Create on email list (Sendy)
Member updated on Ghost blog = Update on email list (Sendy)
Member deleted on Ghost blog = Delete on email list (Sendy)
The free Zapier package gives you 5 free zaps (we only need 3) and 100 tasks per month. This should give you around 90+/- new members per month before you would have to upgrade to a paid package. I will be publishing a new blog soon which shows how to integrate Zapier.
The Newsletter
Sign up to get a monthly email about my coding journey and receive exclusive access to unpublished material and resources.
I've also started to work on another solution which would listen to Ghost via a Golang WebHook handler and update Sendy, essentially bypassing Zapier altogether. If you would like to see a tutorial for this, please subscribe to my newsletter and you will be informed when the walk-through is published!